Lecture
In this lesson we:
- learn how to access View-elements on the screen from the code and change their properties
Create a project:
Project name : P0081_ViewById
Build Target : Android 2.3.3
Application name : ViewById
Package name : ru.startandroid.develop.viewbyid
Create Activity : MainActivity
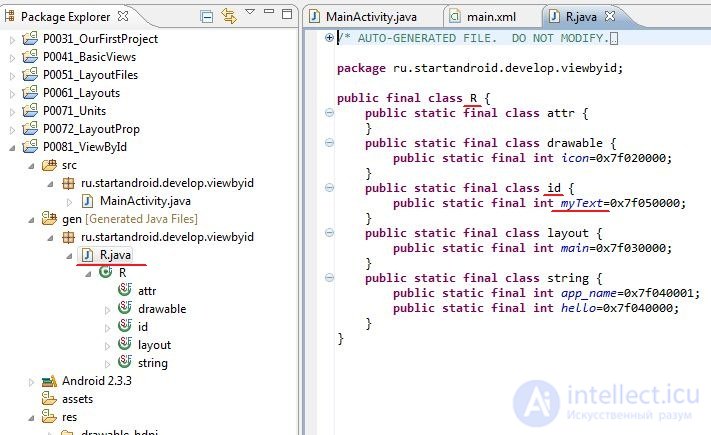
To access the screen element from the code, we need its ID . It is written either in Properties or in layout-files , as you prefer. For ID there is a clear format - @ + id / name , where + means that this is a new resource and it should be added to the R.java class if it does not already exist there.
Let's open main.xml , for TextView we will specify ID = @ + id / myText and save

Now open R.java and see that the constant class myText has appeared for the class id . Those. to address it, you need to write R.id.myText .
It is associated with the TextView element and we can use it to programmatically access the element. For this we need the findViewById method. It returns the View by ID. Let's write a call to this method. Let me remind you that while we are writing our code in the onCreate method. This is the method that is called when an Activity is created. If suddenly it is not clear where to write, you can peek at the end of the lesson, I put the code there.
Let's open MainActivity.java and after the line with the call to the setContentView method, we write:
View myTextView = findViewById (R.id.myText);
If the View is underlined in red, then most likely this class is not added to the import section. Press CTRL + SHIFT + O to automatically update the import.
Now myTextView (of type View) is our TextView on the screen. But type View is an ancestor for TextView (and other View-elements). And it does not suit us if we want to perform operations corresponding to a TextView. Therefore, we need to convert the View to TextView. Change our code to the following:
TextView myTextView = (TextView) findViewById (R.id.myText);
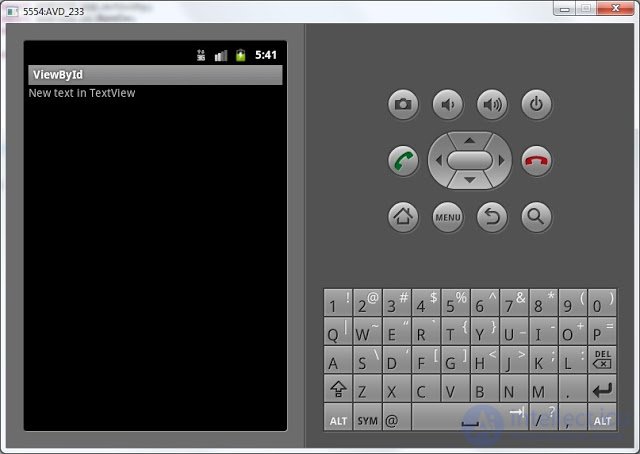
Now myTextView is of type TextView , and the result of the findViewById method we convert from View to TextView. Now we can apply to the myTextView class methods TextView. For example, take the setText method. Currently displayed text = Hello World, MainActivity! . We will programmatically change it to New text in TextView.
myTextView.setText ("New text in TextView");
Save, run (CTRL + F11) and see that the text has changed.
Add a button to the screen (Button), Id = @ + id / myBtn, leave the text as default. Save - CTRL + SHIFT + S (if not saved, then ID does not appear in R.java).
Write the code:
Button myBtn = (Button) findViewById (R.id.myBtn);
Please note that I have the same object name and ID

They do not interfere with each other and so do even more logical. This is up to you. So, we found the button, now let's change its text:
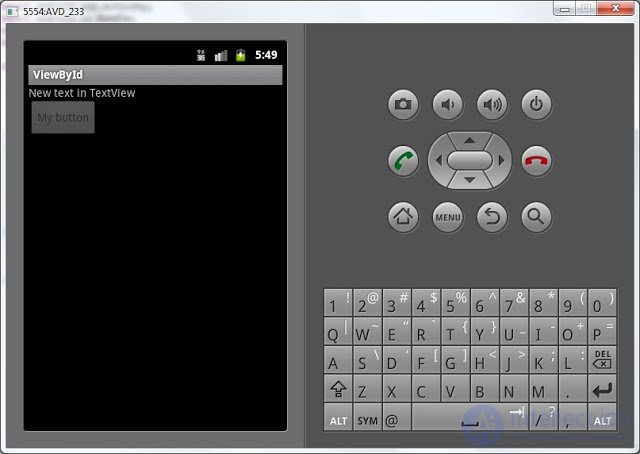
myBtn.setText ("My button");
Run the application. The text on the button has changed, you can click on the button, but nothing will happen. Because we never indicated what to do when pressed. This will do in the next lesson. In the meantime, let's make the button inactive.
myBtn.setEnabled (false);
We changed the parameter Enabled . Now the button can not be pressed. Save, run and make sure.
Add a CheckBox, id = @ + id / myChb. By default, the tick is not worth it. Let's set it programmatically, for this we use the setChecked method, which changes the Checked parameter.
CheckBox myChb = (CheckBox) findViewById (R.id.myChb);
myChb.setChecked(true); Running the application we see that the code worked.
As you can see - everything is easy. We use the findViewById method to get an object by ID that corresponds to some View-element (Button, TextView, CheckBox) and then call the necessary methods of objects (setText, setEnabled, setChecked).
The result should be the following code:
package ru.startandroid.develop.viewbyid;
 import android.app.Activity;
 import android.os.Bundle;
 import android.widget.Button;
 import android.widget.CheckBox;
 import android.widget.TextView;

 public class MainActivity extends Activity {
 /** Called when the activity is first created. */
 @Override
 public void onCreate(Bundle savedInstanceState) {
 super.onCreate(savedInstanceState);
 setContentView(R.layout.main);

 TextView myTextView = (TextView) findViewById(R.id.myText);
 myTextView.setText("New text in TextView");

 Button myBtn = (Button) findViewById(R.id.myBtn);
 myBtn.setText("My button");
 myBtn.setEnabled(false);

 CheckBox myChb = (CheckBox) findViewById(R.id.myChb);
 myChb.setChecked(true);
 }
 }
In the next lesson:
- learn to handle button presses

Comments
To leave a comment
Mobile Programming (Android IOs)
Terms: Mobile Programming (Android IOs)