Lecture
In this lesson:
- parse how you can use LayoutInflater
After exploring SQLite, it's time to start exploring lists - List. But before that it will be useful to learn about LayoutInflater . This knowledge is useful to us in the creation of extended lists. Also, before this lesson, I recommend reading the lesson about LayoutParams again, to refresh the knowledge.
LayoutInflater is a class that can create a View-element from the contents of a layout file. The method that it does is called inflate . There are several implementations of this method with different parameters. But they all use each other and the result of their execution is View .
We will look at this implementation - public View inflate (int resource, ViewGroup root, boolean attachToRoot)
As you can see, the method takes three parameters as input:
resource - ID of the layout file that will be used to create the View. For example - R.layout.main
root is the parent ViewGroup element for the created View. LayoutParams from this ViewGroup are assigned to the created View.
attachToRoot - whether to attach the created View to root. If true, then root becomes the parent of the created View. Those. this is equivalent to the root.addView (View) command. If false, the newly created View simply receives LayoutParams as root, but does not become its child.
Let's look at the practice.
Create a project:
Project name : P0401_LayoutInflater
Build Target : Android 2.3.3
Application name : LayoutInflater
Package name : ru.startandroid.develop.p0401layoutinflater
Create Activity : MainActivity
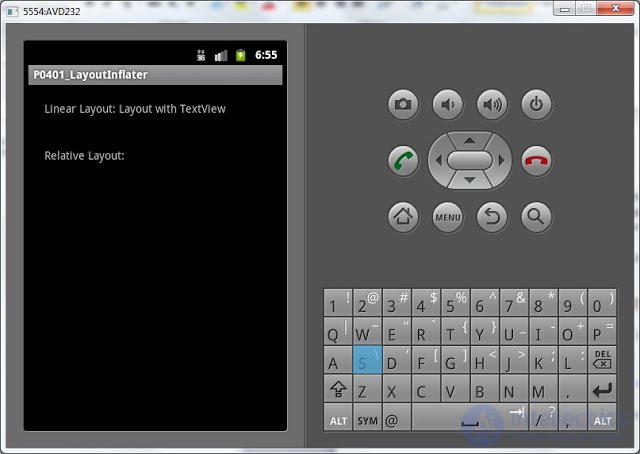
Open the main.xml and draw the following screen:
  <? xml version = "1.0" encoding = "utf-8"?>
  <LinearLayout
  xmlns: android = "http://schemas.android.com/apk/res/android"
  android: layout_width = "fill_parent"
  android: layout_height = "fill_parent"
  android: orientation = "vertical">
  <LinearLayout
  android: id = "@ + id / linLayout"
  android: layout_width = "match_parent"
  android: layout_height = "wrap_content"
  android: layout_margin = "20dp">
  <Textview
  android: layout_width = "wrap_content"
  android: layout_height = "wrap_content"
  android: text = "Linear Layout:">
  </ TextView>
  </ LinearLayout>
  <RelativeLayout
  android: id = "@ + id / relLayout"
  android: layout_width = "match_parent"
  android: layout_height = "wrap_content"
  android: layout_margin = "20dp">
  <Textview
  android: layout_width = "wrap_content"
  android: layout_height = "wrap_content"
  android: text = "Relative Layout:">
  </ TextView>
  </ RelativeLayout>
  </ LinearLayout>
There are two ViewGroups on the screen - linLayout and relLayout . In them on TextView with the corresponding text.
Create another layout file text.xml :
  <? xml version = "1.0" encoding = "utf-8"?>
  <Textview
  xmlns: android = "http://schemas.android.com/apk/res/android"
  android: id = "@ + id / tvLayout"
  android: layout_width = "match_parent"
  android: layout_height = "match_parent"
  android: text = "Layout with TextView">
  </ TextView>
There is just a TextView without any ViewGroup . On it we will also test LayoutInflater .
Open MainActivity.java and write the code:
package ru.startandroid.develop.p0401layoutinflater;

 import android.app.Activity;
 import android.os.Bundle;
 import android.util.Log;
 import android.view.LayoutInflater;
 import android.view.View;
 import android.view.ViewGroup.LayoutParams;
 import android.widget.TextView;

 public class MainActivity extends Activity {

 final String LOG_TAG = "myLogs";

 /** Called when the activity is first created. */
 public void onCreate(Bundle savedInstanceState) {
 super.onCreate(savedInstanceState);
 setContentView(R.layout.main);

 LayoutInflater ltInflater = getLayoutInflater();
 View view = ltInflater.inflate(R.layout.text, null, false);
 LayoutParams lp = view.getLayoutParams();

 Log.d(LOG_TAG, "Class of view: " + view.getClass().toString());
 Log.d(LOG_TAG, "LayoutParams of view is null: " + (lp == null));
 Log.d(LOG_TAG, "Text of view: " + ((TextView) view).getText());
 }
 }
We get the LayoutInflater with the getLayoutInflater method, use it to get the View element from the text.xml layout file, and read the LayoutParams from the newly created view.
Notice the parameters we used for the inflate method. We specified the ID of the layout resource, passed null as the parent element, and, accordingly, binding to the parent is false .
All save and run.
Nothing has changed on the screen. Because we wrapped the layout in view, but didn't put it anywhere. It just hangs in the memory.

We look at the log:
Class of view: class android.widget.TextView
LayoutParams of view is null: true
Text of view: Layout with TextView
We see the class of the created element - TextView . That's right - this element was in the text.xml file . Further we see null instead of LayoutParams . This happened because the parent in the inflate method we specified null . Namely from the parent view and should have received LayoutParams . The third line of the log shows the text TextView. It is the same as in the text.xml layout file - everything is correct.
Let's change the program a little. We will add our created element to linLayout from main.xml . This is done simply by the addView command.
LayoutParams lp = view.getLayoutParams();

 LinearLayout linLayout = (LinearLayout) findViewById(R.id.linLayout);
 linLayout.addView(view) ;

 Log.d(LOG_TAG, "Class of view: " + view.getClass().toString());
(add only bold italic code )
We found linLayout from the screen and added an element created using LayoutInflater to it.
Save, run. We see that the item was added to the screen in linLayout.
Now let's try to specify the parent ( root ) when calling the inflate method. Rewrite the onCreate method:
public void onCreate(Bundle savedInstanceState) {
 super.onCreate(savedInstanceState);
 setContentView(R.layout.main);

 LayoutInflater ltInflater = getLayoutInflater();

 LinearLayout linLayout = (LinearLayout) findViewById(R.id.linLayout);
 View view1 = ltInflater.inflate(R.layout.text, linLayout, false);
 LayoutParams lp1 = view1.getLayoutParams();

 Log.d(LOG_TAG, "Class of view1: " + view1.getClass().toString());
 Log.d(LOG_TAG, "Class of layoutParams of view1: " + lp1.getClass().toString());
 Log.d(LOG_TAG, "Text of view1: " + ((TextView) view1).getText());

 RelativeLayout relLayout = (RelativeLayout) findViewById(R.id.relLayout);
 View view2 = ltInflater.inflate(R.layout.text, relLayout, false);
 LayoutParams lp2 = view2.getLayoutParams();

 Log.d(LOG_TAG, "Class of view2: " + view2.getClass().toString());
 Log.d(LOG_TAG, "Class of layoutParams of view2: " + lp2.getClass().toString());
 Log.d(LOG_TAG, "Text of view2: " + ((TextView) view2).getText());
 }
We find the linLayout and relLayout elements from the screen and use the LayoutInflater to create two View elements from the text.xml layout file. For the first, specify root - linLayout , for the second - relLayout . But the third parameter attachToRoot is left false . This means that the created View element will receive the LayoutParams from the root element, but will not be added to it.
All save, run. On the screen, nothing has changed. Because we didn't add new elements to anything and attachToRoot = false .
We look at the log:
Class of view1: class android.widget.TextView
Class of layoutParams of view1: class android.widget.LinearLayout $ LayoutParams
Text of view1: Layout with TextView
Class of view2: class android.widget.TextView
Class of layoutParams of view2: class android.widget.RelativeLayout $ LayoutParams
Text of view2: Layout with TextView
The logs show that the class of the created elements is TextView . And the LayoutParams class is different. In the first case, this is LinearLayout $ LayoutParams , since We specify linLayout as the root element in the inflate method, and this is an object of the LinearLayout class. In the second case, the LayoutParams class for the created element is RelativeLayout $ LayoutParams . Because relLayout (class RelativeLayout ) was specified as root.
Now we have two options for how to add the created view1 and view2 to the screen.
1) Use addView methods again
2) Pass true as the third parameter of the inflate method. Then the created View- element will be added to root
Choose the second option and make changes to the code:
public void onCreate(Bundle savedInstanceState) {
 super.onCreate(savedInstanceState);
 setContentView(R.layout.main);

 LayoutInflater ltInflater = getLayoutInflater();

 LinearLayout linLayout = (LinearLayout) findViewById(R.id.linLayout);
 View view1 = ltInflater.inflate(R.layout.text, linLayout, true);
 LayoutParams lp1 = view1.getLayoutParams();

 Log.d(LOG_TAG, "Class of view1: " + view1.getClass().toString());
 Log.d(LOG_TAG, "Class of layoutParams of view1: " + lp1.getClass().toString());

 RelativeLayout relLayout = (RelativeLayout) findViewById(R.id.relLayout);
 View view2 = ltInflater.inflate(R.layout.text, relLayout, true);
 LayoutParams lp2 = view2.getLayoutParams();

 Log.d(LOG_TAG, "Class of view2: " + view2.getClass().toString());
 Log.d(LOG_TAG, "Class of layoutParams of view2: " + lp2.getClass().toString());
 }
Pass true as the third parameter in the inflate method and remove the lines for outputting text from the TextView to the log. Now it will be clear why.
All save and run the application.
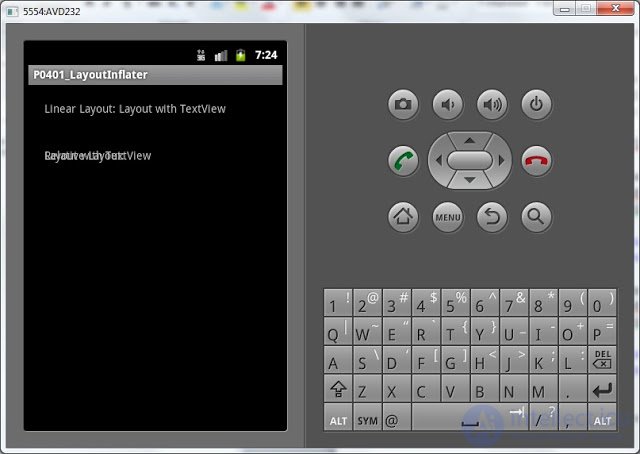
As you can see, the created TextView appeared in their parents, which we specified in the inflate method. In RelativeLayout, the elements overlapped each other, because we have not configured the location. At the moment it is not significant.
We look at the log:
Class of view1: class android.widget.LinearLayout
Class of layoutParams of view1: class android.widget.LinearLayout $ LayoutParams
Class of view2: class android.widget.RelativeLayout
Class of layoutParams of view2: class android.widget.LinearLayout $ LayoutParams
Pay attention to the class of elements. In the first case - this is LinearLayout , and in the second - RelativeLayout . Those. The inflate method returned to us not View-elements created from the layout-file, but those that we specified as root . And he added elements created from the View layout file to root as children, similar to the addView command . This happened because we specified true in the third parameter (attachToRoot) of the inflate method.
Accordingly, the LayoutParams for view1 and view2 will be LinearLayout $ LayoutParams , since linLayout and relLayout have a parent LinearLayout . And LayoutParams take from it.
To fix the topic in the next lesson we will make an example more interesting.
In the next lesson:
- make your own version of the list

Т.е. метод inflate вернул нам не созданные из layout-файла View-элементы, а те, что мы указывали как root. А созданные из layout-файла View элементы он добавил в root как дочерние аналогично команде addView.
Не понял, что вы хотели сказать этими предложениями. Как-то путано получилось. Хотя без этого абзаца в общем-то, всё ясно.
Я здесь говорю о том, что inflate вернул не view, построенные из R.layout.text, а linLayout и relLayout, которые мы передавали в inflate в качестве второго параметра (root). Т.е. если строишь элемент из layout без привязки к родителю (третий параметр = false), то получаешь этот элемент. Если привязываешь к родителю (true), то получаешь уже родителя, а не тот элемент, который строил из layout.
Comments
To leave a comment
Mobile Programming (Android IOs)
Terms: Mobile Programming (Android IOs)