Lecture
In this lesson we:
- consider the animation of view components
 - video lesson version
Before serious topics, I decided to consider one more interesting and, in my opinion, simple topic. True, I will consider only the top and not go into the wilds. Theme - animation. We will learn how to make the following transformations with ordinary View components:
- change transparency
- resize
- move
- turn
Let's create project :
Project name : P0201_SimpleAnimation
Build Target : Android 2.3.3
Application name : SimpleAnimation
Package name : ru.startandroid.develop.p0201simpleanimation
Create Activity : MainActivity
Transformations are configured in XML files, then in the program code are read and assigned to View-elements. I will not duplicate the help and paint everything, but go straight to the practice.
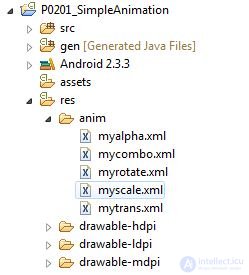
There is a res folder in our project. It is necessary to create anim folder in it. You can do this, for example, like this: right-click on res and in the menu select New -> Folder . Files must be created in the anim folder. This is done in the same way: right-click on anim and select New -> File in the menu. In these files we will configure the animation.
Create the following files in the res / anim folder:
File Name : myalpha.xml
Content :
  <? xml version = "1.0" encoding = "utf-8"?>
  <alpha
  xmlns: android = "http://schemas.android.com/apk/res/android"
  android: fromAlpha = "0.0"
  android: toAlpha = "1.0"
  android: duration = "3000">
  </ alpha>
Transformation Description : changes transparency from 0 to 1 for three seconds.
File Name : myscale.xml
Content :
  <? xml version = "1.0" encoding = "utf-8"?>
  <scale
  xmlns: android = "http://schemas.android.com/apk/res/android"
  android: fromXScale = "0.1"
  android: toXScale = "1.0"
  android: fromYScale = "0.1"
  android: toYScale = "1.0"
  android: pivotX = "50%"
  android: pivotY = "50%"
  android: duration = "3000">
  </ scale>
Transformation description : resizing from 0.1 from the original width and height to 1. The point relative to which the scaling will be performed lies exactly in the middle of the object (pivotX, pivotY). Duration - 3 seconds.
File Name : mytrans.xml
Content :
  <? xml version = "1.0" encoding = "utf-8"?>
  <translate
  xmlns: android = "http://schemas.android.com/apk/res/android"
  android: fromXDelta = "- 150"
  android: toXDelta = "0"
  android: fromYDelta = "- 200"
  android: toYDelta = "0"
  android: duration = "3000">
  </ translate>
Transformation description : moving from -150 relative to the current position along the X axis and -200 along the Y axis to the current position (0,0). Duration - 3 seconds.
File Name : myrotate.xml
Content :
  <? xml version = "1.0" encoding = "utf-8"?>
  <rotate
  xmlns: android = "http://schemas.android.com/apk/res/android"
  android: fromDegrees = "0"
  android: toDegrees = "360"
  android: duration = "3000">
  </ rotate>
Transformation description : rotation relative to the upper left corner (since pivotX, pivotY are not indicated) by 360 degrees for three seconds
File Name : mycombo.xml
Content :
  <? xml version = "1.0" encoding = "utf-8"?>
  <set
  xmlns: android = "http://schemas.android.com/apk/res/android">
  <rotate
  android: fromDegrees = "0"
  android: toDegrees = "360"
  android: duration = "3000"
  android: pivotX = "50%"
  android: pivotY = "50%">
  </ rotate>
  <scale
  android: fromXScale = "0.1"
  android: toXScale = "1.0"
  android: fromYScale = "0.1"
  android: toYScale = "1.0"
  android: pivotX = "50%"
  android: pivotY = "50%"
  android: duration = "3000">
  </ scale>
  </ set>
Description of the transformation : at the same time increasing the size and rotation for three seconds. Notice that the <set> tag is used for the transform combination.
So, we created 5 animation files.
And now we can apply them to View components.
Open main.xml and create a screen:
  <? xml version = "1.0" encoding = "utf-8"?>
  <Framelayout
  xmlns: android = "http://schemas.android.com/apk/res/android"
  android: layout_width = "match_parent"
  android: id = "@ + id / frameLayout1"
  android: layout_height = "match_parent">
  <Textview
  android: text = "TextView"
  android: layout_width = "wrap_content"
  android: layout_height = "wrap_content"
  android: layout_gravity = "center_vertical | center_horizontal"
  android: id = "@ + id / tv"
  android: textSize = "38sp">
  </ TextView>
  </ FrameLayout>
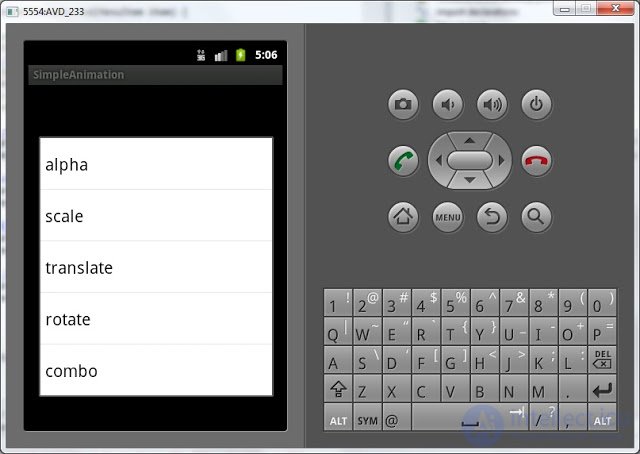
In the center of the screen is TextView , and we will apply transformations to it. To do this, create a context menu for TextView, add menu items that correspond to our sets, and when we click, we will start the animation.
package ru.startandroid.develop.p0201simpleanimation;

 import android.app.Activity;
 import android.os.Bundle;
 import android.view.ContextMenu;
 import android.view.ContextMenu.ContextMenuInfo;
 import android.view.MenuItem;
 import android.view.View;
 import android.view.animation.Animation;
 import android.view.animation.AnimationUtils;
 import android.widget.TextView;

 public class MainActivity extends Activity {

 // константы для ID пунктов меню
 final int MENU_ALPHA_ID = 1;
 final int MENU_SCALE_ID = 2;
 final int MENU_TRANSLATE_ID = 3;
 final int MENU_ROTATE_ID = 4;
 final int MENU_COMBO_ID = 5;

 TextView tv;

 /** Called when the activity is first created. */
 @Override
 public void onCreate(Bundle savedInstanceState) {
 super.onCreate(savedInstanceState);
 setContentView(R.layout.main);

 tv = (TextView) findViewById(R.id.tv);
 // регистрируем контекстное меню для компонента tv
 registerForContextMenu(tv);
 }

 @Override
 public void onCreateContextMenu(ContextMenu menu, View v,
 ContextMenuInfo menuInfo) {
 // TODO Auto-generated method stub
 switch (v.getId()) {
 case R.id.tv:
 // добавляем пункты
 menu.add(0, MENU_ALPHA_ID, 0, "alpha");
 menu.add(0, MENU_SCALE_ID, 0, "scale");
 menu.add(0, MENU_TRANSLATE_ID, 0, "translate");
 menu.add(0, MENU_ROTATE_ID, 0, "rotate");
 menu.add(0, MENU_COMBO_ID, 0, "combo");
 break;
 }
 super.onCreateContextMenu(menu, v, menuInfo);
 }

 @Override
 public boolean onContextItemSelected(MenuItem item) {
 Animation anim = null;
 // определяем какой пункт был нажат
 switch (item.getItemId()) {
 case MENU_ALPHA_ID:
 // создаем объект анимации из файла anim/myalpha
 anim = AnimationUtils.loadAnimation(this, R.anim.myalpha);
 break;
 case MENU_SCALE_ID:
 anim = AnimationUtils.loadAnimation(this, R.anim.myscale);
 break;
 case MENU_TRANSLATE_ID:
 anim = AnimationUtils.loadAnimation(this, R.anim.mytrans);
 break;
 case MENU_ROTATE_ID:
 anim = AnimationUtils.loadAnimation(this, R.anim.myrotate);
 break;
 case MENU_COMBO_ID:
 anim = AnimationUtils.loadAnimation(this, R.anim.mycombo);
 break;
 }
 // запускаем анимацию для компонента tv
 tv.startAnimation(anim);
 return super.onContextItemSelected(item);
 }
 }
The animation is read from the xml-file by the AnimationUtils.loadAnimation method, the output is an Animation type object. It is used in the startAnimation method, which starts the animation.
All save and run the application. Call the context menu for TextView, and test animations.
I did not use all the features and options. There is, for example, the parameter android: startOffset - it indicates the delay at the start of the animation. Those. If you specify android: startOffset = "1000", then the animation will begin in a second. This is convenient to use if you are making a set of transforms (<set>) and you want them to start not simultaneously, but in a specific order. Also a useful parameter android: repeatCount is the number of repetitions.
I recommend playing with the parameters in the XML files and see what happens.
On our YouTube channel a test based on the materials of the second tens of lessons has been prepared. If you have a desire to test your knowledge, I suggest you pass it.
In the next lesson:
- create a second screen in the application

Comments
To leave a comment
Mobile Programming (Android IOs)
Terms: Mobile Programming (Android IOs)