Lecture
In this lesson:
- data storage using SQLite
In the last lesson we looked at the easiest way to store data - Preferences . But this method is rather limited and inconvenient for storing large amounts of structured data. In this lesson, consider SQLite. This is a database with tables and queries - all as in ordinary databases.
To begin with, it is a little theory on interaction of the application and a DB.
In the application, when connecting to the database, we specify the database name and version . The following situations may arise:
1) DB does not exist . This may be for example in the case of the initial installation of the program. In this case, the application should create the database itself and all the tables in it. And then it already works with the newly created database.
2) DB exists , but its version is outdated . This may be in the case of a program update. For example, a new version of the program needs additional fields in old tables or new tables. In this case, the application should update existing tables and create new ones, if necessary.
3) DB exists and its version is relevant . In this case, the application successfully connects to the database and works.
As you understand, the phrase “application must” is equivalent to the phrase “developer must”, i.e. this is our task. To handle the situations described above, we need to create a class that is a successor to SQLiteOpenHelper. Let's call it DBHelper. This class will provide us with methods for creating or updating the database in cases of its absence or obsolescence .
onCreate - the method that will be called if the database to which we want to connect does not exist
onUpgrade - will be called if we are trying to connect to a database of a newer version than the existing one
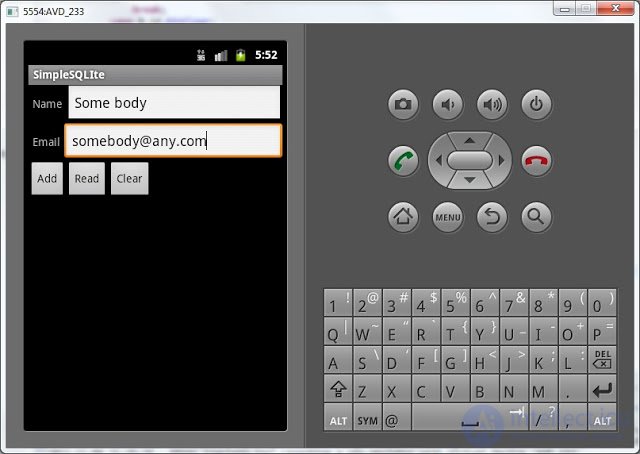
Let's roll up a simple application - a directory of contacts that will store the name and email . We will enter data on the application screen , and use the logs to display information. Usually List is used for this - but we do not know this topic yet. And I do not want to overload the application. The main thing is to master the techniques of working with the database.
Create a project:
Project name : P0341_SimpleSQLite
Build Target : Android 2.3.3
Application name : SimpleSQLite
Package name : ru.startandroid.develop.p0341simplesqlite
Create Activity : MainActivity
Let's draw a screen for entering records and clearing the table. Open main.xml and write:
  <? xml version = "1.0" encoding = "utf-8"?>
  <LinearLayout
  xmlns: android = "http://schemas.android.com/apk/res/android"
  android: layout_width = "fill_parent"
  android: layout_height = "fill_parent"
  android: orientation = "vertical">
  <LinearLayout
  android: id = "@ + id / linearLayout1"
  android: layout_width = "match_parent"
  android: layout_height = "wrap_content">
  <Textview
  android: layout_width = "wrap_content"
  android: layout_height = "wrap_content"
  android: text = "Name"
  android: layout_marginLeft = "5dp"
  android: layout_marginRight = "5dp">
  </ TextView>
  <Edittext
  android: id = "@ + id / etName"
  android: layout_width = "wrap_content"
  android: layout_height = "wrap_content"
  android: layout_weight = "1">
  <requestFocus>
  </ requestFocus>
  </ Edittext>
  </ LinearLayout>
  <LinearLayout
  android: id = "@ + id / linearLayout3"
  android: layout_width = "match_parent"
  android: layout_height = "wrap_content">
  <Textview
  android: id = "@ + id / textView2"
  android: layout_width = "wrap_content"
  android: layout_height = "wrap_content"
  android: text = "Email"
  android: layout_marginLeft = "5dp"
  android: layout_marginRight = "5dp">
  </ TextView>
  <Edittext
  android: id = "@ + id / etEmail"
  android: layout_width = "wrap_content"
  android: layout_height = "wrap_content"
  android: layout_weight = "1">
  </ Edittext>
  </ LinearLayout>
  <LinearLayout
  android: id = "@ + id / linearLayout2"
  android: layout_width = "match_parent"
  android: layout_height = "wrap_content">
  <Button
  android: id = "@ + id / btnAdd"
  android: layout_width = "wrap_content"
  android: layout_height = "wrap_content"
  android: text = "Add">
  </ Button>
  <Button
  android: id = "@ + id / btnRead"
  android: layout_width = "wrap_content"
  android: layout_height = "wrap_content"
  android: text = "Read">
  </ Button>
  <Button
  android: id = "@ + id / btnClear"
  android: layout_width = "wrap_content"
  android: layout_height = "wrap_content"
  android: text = "Clear">
  </ Button>
  </ LinearLayout>
  </ LinearLayout>
A couple of input fields and a button to add a record, display existing records and clear the table.
Open MainActivity.java and write:
package ru.startandroid.develop.p0341simplesqlite;

 import android.app.Activity;
 import android.content.ContentValues;
 import android.content.Context;
 import android.database.Cursor;
 import android.database.sqlite.SQLiteDatabase;
 import android.database.sqlite.SQLiteOpenHelper;
 import android.os.Bundle;
 import android.util.Log;
 import android.view.View;
 import android.view.View.OnClickListener;
 import android.widget.Button;
 import android.widget.EditText;

 public class MainActivity extends Activity implements OnClickListener {

 final String LOG_TAG = "myLogs";

 Button btnAdd, btnRead, btnClear;
 EditText etName, etEmail;

 DBHelper dbHelper;

 /** Called when the activity is first created. */
 @Override
 public void onCreate(Bundle savedInstanceState) {
 super.onCreate(savedInstanceState);
 setContentView(R.layout.main);

 btnAdd = (Button) findViewById(R.id.btnAdd);
 btnAdd.setOnClickListener(this);

 btnRead = (Button) findViewById(R.id.btnRead);
 btnRead.setOnClickListener(this);

 btnClear = (Button) findViewById(R.id.btnClear);
 btnClear.setOnClickListener(this);

 etName = (EditText) findViewById(R.id.etName);
 etEmail = (EditText) findViewById(R.id.etEmail);

 // создаем объект для создания и управления версиями БД
 dbHelper = new DBHelper(this);
 }


 @Override
 public void onClick(View v) {

 // создаем объект для данных
 ContentValues cv = new ContentValues();

 // получаем данные из полей ввода
 String name = etName.getText().toString();
 String email = etEmail.getText().toString();

 // подключаемся к БД
 SQLiteDatabase db = dbHelper.getWritableDatabase();


 switch (v.getId()) {
 case R.id.btnAdd:
 Log.d(LOG_TAG, "--- Insert in mytable: ---");
 // подготовим данные для вставки в виде пар: наименование столбца - значение

 cv.put("name", name);
 cv.put("email", email);
 // вставляем запись и получаем ее ID
 long rowID = db.insert("mytable", null, cv);
 Log.d(LOG_TAG, "row inserted, ID = " + rowID);
 break;
 case R.id.btnRead:
 Log.d(LOG_TAG, "--- Rows in mytable: ---");
 // делаем запрос всех данных из таблицы mytable, получаем Cursor
 Cursor c = db.query("mytable", null, null, null, null, null, null);

 // ставим позицию курсора на первую строку выборки
 // если в выборке нет строк, вернется false
 if (c.moveToFirst()) {

 // определяем номера столбцов по имени в выборке
 int idColIndex = c.getColumnIndex("id");
 int nameColIndex = c.getColumnIndex("name");
 int emailColIndex = c.getColumnIndex("email");

 do {
 // получаем значения по номерам столбцов и пишем все в лог
 Log.d(LOG_TAG,
 "ID = " + c.getInt(idColIndex) +
 ", name = " + c.getString(nameColIndex) +
 ", email = " + c.getString(emailColIndex));
 // переход на следующую строку
 // а если следующей нет (текущая - последняя), то false - выходим из цикла
 } while (c.moveToNext());
 } else
 Log.d(LOG_TAG, "0 rows");
 c.close();
 break;
 case R.id.btnClear:
 Log.d(LOG_TAG, "--- Clear mytable: ---");
 // удаляем все записи
 int clearCount = db.delete("mytable", null, null);
 Log.d(LOG_TAG, "deleted rows count = " + clearCount);
 break;
 }
 // закрываем подключение к БД
 dbHelper.close();
 }


 class DBHelper extends SQLiteOpenHelper {

 public DBHelper(Context context) {
 // конструктор суперкласса
 super(context, "myDB", null, 1);
 }

 @Override
 public void onCreate(SQLiteDatabase db) {
 Log.d(LOG_TAG, "--- onCreate database ---");
 // создаем таблицу с полями
 db.execSQL("create table mytable ("
 + "id integer primary key autoincrement,"
 + "name text,"
 + "email text" + ");");
 }

 @Override
 public void onUpgrade(SQLiteDatabase db, int oldVersion, int newVersion) {

 }
 }

 }
A bunch of new unfamiliar words in the code. Let's figure it out.
In the Activity - onCreate method, we define objects, assign handlers, and create a dbHelper object of the DBHelper class to manage the database. The class itself will be described below.
Next, we look at the Activity method - onClick , in which we handle button presses.
The ContentValues class is used to specify table fields and values that we will insert into these fields. We create a cv object, and use it later. Next, we write to variable values from the input fields . Then, using the getWritableDatabase method, we connect to the database and get the SQLiteDatabase object. He will allow us to work with the database. We will use its methods insert - insert record, query - read, delete - delete. They have a lot of different input parameters, but for now we are using the very minimum.
Next, we look at which button was pressed:
btnAdd - adding an entry to the table mytable . We fill the cv object with pairs: field name and value . And (when inserting a record into a table) the corresponding values will be inserted into the specified fields. We fill in the name and email fields. Our id will be filled automatically (primary key autoincrement). Call the insert method - pass it the name of the table and the cv object with the values inserted. The second argument of the method is used when inserting an empty string into the table. We do not need this now, so we pass null. The insert method returns the ID of the inserted row, we save it to the rowID and output it to the log .
btnRead - read all records from the table mytable . For reading the query method is used. The input is the name of the table , the list of requested fields, selection conditions, grouping, sorting. Because we need all the data in all fields without sorting and grouping - we use null everywhere. Only the table name is specified. The method returns us an object of the Cursor class. It can be viewed as a table with data. The moveToFirst method - makes the first entry in the Cursor active and at the same time checks if there are any entries in it at all (that is, if something has been selected in the query method). Next, we get the ordinal numbers of the columns in Cursor by their names using the getColumnIndex method. These numbers are then used to read the data in the getInt and getString methods and output the data to the log. Using the moveToNext method, we iterate through all the lines in the Cursor until we get to the last. If there were no posts, then output the corresponding message to the log - 0 rows . At the end we close the cursor (we release the resources it occupies) using the close method, since further we do not use it anywhere.
btnClear - clearing the table. The delete method deletes entries. At the input we pass the name of the table and null as conditions for deletion, which means everything will be deleted. The method returns the number of deleted records.
After that we close the connection with the database using the close method.
The DBHelper class is nested in MainActivity and is described at the end of the code. As I wrote above, this class must inherit the SQLiteOpenHelper class.
In the constructor, we call the superclass constructor and pass it to it:
context
mydb - database name
null is an object for working with cursors, we do not need it yet, therefore null
1 - database version
In the onCreate method of this class, we use the execSQL method of the SQLiteDatabase object to execute the SQL query that creates the table. Let me remind you - this method is called if the database does not exist and needs to be created. Upon request, you can see that we create a table mytable with the fields id , name and email .
The onUpgrade method is not yet filled, because We use one version of the database and do not plan to change it.
All save and run the application. We will work with the database and watch the logs, which will show which methods are executed and what is happening in them.
Enter something in the input fields and click Add .

We look at the log:
--- onCreate database ---
--- Insert in mytable: ---
row inserted, id = 1
We see that the onCreate method was called in the DBHelper class, which means the script for creating the table was executed. This happened because this is the first launch of the application and the database has not yet been created . Now the database exists and you can work with it.
Further we see that the insert record method was called and returned ID = 1.
Insert another entry.
We look at the log:
--- Insert in mytable: ---
row inserted, id = 2
This time onCreate was not called , since DB already exists . Inserted entry with ID = 2.
Let's see the contents of the table - click the Read button and see the log:
--- Rows in mytable: ---
ID = 1, name = John Smith, email = john.smith@abc.com
ID = 2, name = Some body, email = somebody@any.com
We see the records that are inserted. It's all right here.
Now clear the table - click Clear . We look at the log:
--- Clear mytable: ---
deleted rows count = 2
Removed two entries, all right. If we now look at the contents of the table - the Read button:
--- Rows in mytable: ---
0 rows
No records.
In this topic, it is important to understand that we used two classes to work with the database:
- DBHelper , inheriting SQLiteOpenHelper . In its constructor, we call the super-class constructor and specify the name and version of the database. The getWritableDatabase method connects to the database and returns a SQLiteDatabase object for working with it. The close method closes the connection to the database. In the case when the database is missing or outdated, the class allows us to implement the creation or update in the onCreate and onUpgrate methods .
- SQLiteDatabase . Contains methods for working with data - i.e. insert , update , delete and read .
File base can be found in File Explorer , as in the previous lesson. The path to it is data / data / ru.startandroid.develop.p0341simpelsqlite / databases / myDB .
In the next lesson we will continue this application. Add the ability to update and delete specific records.
In the next lesson:
- we use the query and delete methods with indication of the condition

Comments
To leave a comment
Mobile Programming (Android IOs)
Terms: Mobile Programming (Android IOs)