Lecture
In this lesson:
- we transfer data by means of Intent
In past lessons we learned what Intent is and how to use it. From one Activity we simply called another, passing action . Now let's learn how to transfer data . Let's make the simplest application. On the first screen, we will enter our first and last name, and the second screen will display this data. We will transfer the data inside the Intent .
Let's create project :
Project name : P0281_IntentExtras
Build Target : Android 2.3.3
Application name : IntentExtras
Package name : ru.startandroid.develop.p0281intentextras
Create Activity : MainActivity
Open main.xml and draw a screen with fields and a submit button:
  <? xml version = "1.0" encoding = "utf-8"?>
  <LinearLayout
  xmlns: android = "http://schemas.android.com/apk/res/android"
  android: layout_width = "fill_parent"
  android: layout_height = "fill_parent"
  android: orientation = "vertical">
  <Textview
  android: layout_width = "fill_parent"
  android: layout_height = "wrap_content"
  android: layout_marginTop = "10dp"
  android: gravity = "center_horizontal"
  android: text = "Input your Name">
  </ TextView>
  <TableLayout
  android: id = "@ + id / tableLayout1"
  android: layout_width = "match_parent"
  android: layout_height = "wrap_content"
  android: layout_margin = "10dp"
  android: stretchColumns = "1">
  <TableRow
  android: id = "@ + id / tableRow1"
  android: layout_width = "match_parent"
  android: layout_height = "wrap_content">
  <Textview
  android: id = "@ + id / textView1"
  android: layout_width = "match_parent"
  android: layout_height = "wrap_content"
  android: text = "First Name">
  </ TextView>
  <Edittext
  android: id = "@ + id / etFName"
  android: layout_width = "match_parent"
  android: layout_height = "wrap_content"
  android: layout_marginLeft = "5dp">
  <requestFocus>
  </ requestFocus>
  </ Edittext>
  </ TableRow>
  <TableRow
  android: id = "@ + id / tableRow2"
  android: layout_width = "match_parent"
  android: layout_height = "wrap_content">
  <Textview
  android: id = "@ + id / textView2"
  android: layout_width = "match_parent"
  android: layout_height = "wrap_content"
  android: text = "Last Name">
  </ TextView>
  <Edittext
  android: id = "@ + id / etLName"
  android: layout_width = "match_parent"
  android: layout_height = "wrap_content"
  android: layout_marginLeft = "5dp">
  </ Edittext>
  </ TableRow>
  </ TableLayout>
  <Button
  android: id = "@ + id / btnSubmit"
  android: layout_width = "wrap_content"
  android: layout_height = "wrap_content"
  android: layout_gravity = "center_horizontal"
  android: text = "Submit">
  </ Button>
  </ LinearLayout>
In EditText we will enter the name and surname, and the Submit button will call up another screen and transmit this data to it.
We write the code for MainActivity.java :
package ru.startandroid.develop.p0281intentextras;

 import android.app.Activity;
 import android.content.Intent;
 import android.os.Bundle;
 import android.view.View;
 import android.view.View.OnClickListener;
 import android.widget.Button;
 import android.widget.EditText;

 public class MainActivity extends Activity implements OnClickListener {

 EditText etFName;
 EditText etLName;

 Button btnSubmit;


 /** Called when the activity is first created. */
 @Override
 public void onCreate(Bundle savedInstanceState) {
 super.onCreate(savedInstanceState);
 setContentView(R.layout.main);

 etFName = (EditText) findViewById(R.id.etFName);
 etLName = (EditText) findViewById(R.id.etLName);

 btnSubmit = (Button) findViewById(R.id.btnSubmit);
 btnSubmit.setOnClickListener(this);

 }


 @Override
 public void onClick(View v) {
 Intent intent = new Intent(this, ViewActivity.class);
 intent.putExtra("fname", etFName.getText().toString());
 intent.putExtra("lname", etLName.getText().toString());
 startActivity(intent);
 }
 }
We define input fields and a button. The button assigns a handler - Activity (this). Consider the implementation of the onClick method. We create an Intent using a class, not an action. If you remember, from this way we started our acquaintance with Intent. Let me remind you - this means that the system will look through the manifest file of our application, and if it finds an Activity with such a class, it will display it. ViewActivity has not yet been created, so the code will be underlined in red. This does not prevent us from saving the file. We will create this Activity a little later and the error will disappear.
So, Intent is created, we look at the code further. The putExtra method is used. It has many variations and is similar to the put method for Map , i.e. adds a pair to the object. The first parameter is the key (name), the second is the value .
We placed two objects in the Intent with the names: fname and lname . fname contains the value of the etFName field, lname is the value of the etLName field. It remains only to send the completed Intent using the startActivity method.
Now create a second Activity. Let's call it ViewActivity .
Create a view.xml layout file for it:
  <? xml version = "1.0" encoding = "utf-8"?>
  <LinearLayout
  xmlns: android = "http://schemas.android.com/apk/res/android"
  android: layout_width = "match_parent"
  android: layout_height = "match_parent"
  android: orientation = "vertical">
  <Textview
  android: id = "@ + id / tvView"
  android: layout_width = "wrap_content"
  android: layout_height = "wrap_content"
  android: layout_gravity = "center_horizontal"
  android: layout_marginTop = "20dp"
  android: text = "TextView"
  android: textSize = "20sp">
  </ TextView>
  </ LinearLayout>
Here is just a textview that will display the incoming data.
Create a class ViewActivity . And write the code:
package ru.startandroid.develop.p0281intentextras;

 import android.app.Activity;
 import android.content.Intent;
 import android.os.Bundle;
 import android.widget.TextView;

 public class ViewActivity extends Activity {

 TextView tvView;

 @Override
 protected void onCreate(Bundle savedInstanceState) {
 super.onCreate(savedInstanceState);
 setContentView(R.layout.view);

 tvView = (TextView) findViewById(R.id.tvView);

 Intent intent = getIntent();

 String fName = intent.getStringExtra("fname");
 String lName = intent.getStringExtra("lname");

 tvView.setText("Your name is: " + fName + " " + lName);
 }
 }
We find TextView, then we receive Intent and we retrieve from it String-objects with the names fname and lname . These are the objects that we placed in the code MainActivity.java. We form the output line in TextView using the received data.
Don't forget to put ViewActivity in the manifest. At this time, no Intent Filter is needed, because we know exactly the name of the class Activity and use an explicit call.
All save and run.
We see such a screen:
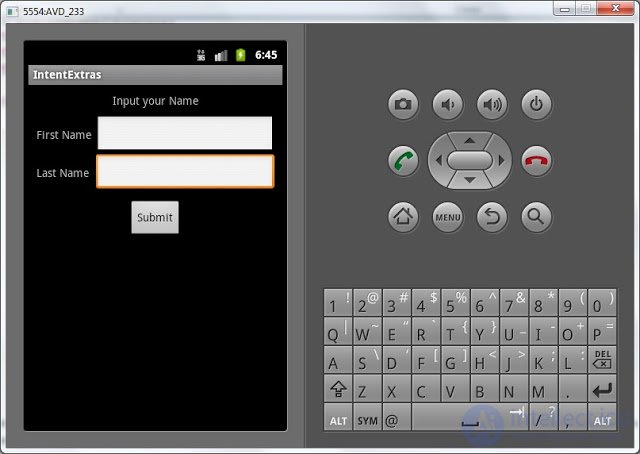
Fill in the fields as you wish. I will write John in the First Name field and Smith in the Last Name field.
Click Submit:
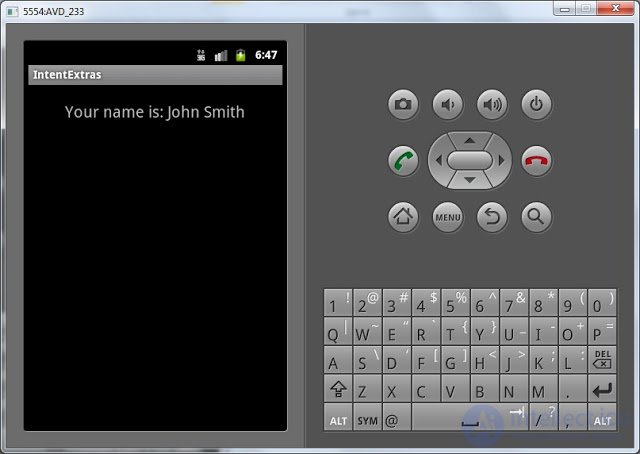
ViewActivity is displayed, read the data from the Intent and display it on the screen.
It is possible to place data into Intent not only of type String. In the list of Intent methods, you can see all the variety of types that the putExtra method can accept as input.
In the next lesson:
- call Activity returning the result

Comments
To leave a comment
Mobile Programming (Android IOs)
Terms: Mobile Programming (Android IOs)