Lecture
In this lesson:
- consider an example of using SimpleAdapter
 - video lesson version
SimpleAdapter works with this kind of data. List <? extends Map <String,? >> - i.e. collection of Map objects (or-heirs). When viewed from the point of view of the list, each Map contains data for the corresponding list item . In order for the adapter to know what data to insert into which View components of each list item we specify two arrays: String [] from and int [] to . In from we list the keys from the Map, and in to - the ID of the View components. The adapter iterates over the View from the to array and matches the values from the Map to the keys from .
Let's check it with an example. Let's create a small list, each item of which will consist of a checkbox, a text field and a picture.
Create a project:
Project name : P0481_SimpleAdapter
Build Target : Android 2.3.3
Application name : SimpleAdapter
Package name : ru.startandroid.develop.p0481simpleadapter
Create Activity : MainActivity
Draw the main.xml screen:
  <? xml version = "1.0" encoding = "utf-8"?>
  <LinearLayout
  xmlns: android = "http://schemas.android.com/apk/res/android"
  android: layout_width = "fill_parent"
  android: layout_height = "fill_parent"
  android: orientation = "vertical">
  <ListView
  android: id = "@ + id / lvSimple"
  android: layout_width = "match_parent"
  android: layout_height = "wrap_content">
  </ Listview>
  </ LinearLayout>
Here only LIstView.
Create item.xml for list item:
  <? xml version = "1.0" encoding = "utf-8"?>
  <LinearLayout
  xmlns: android = "http://schemas.android.com/apk/res/android"
  android: layout_width = "match_parent"
  android: layout_height = "match_parent"
  android: orientation = "horizontal">
  <ImageView
  android: id = "@ + id / ivImg"
  android: layout_width = "wrap_content"
  android: layout_height = "wrap_content"
  android: src = "@ drawable / ic_launcher">
  </ ImageView>
  <LinearLayout
  android: id = "@ + id / linearLayout1"
  android: layout_width = "match_parent"
  android: layout_height = "wrap_content"
  android: layout_weight = "1"
  android: orientation = "vertical">
  <Checkbox
  android: id = "@ + id / cbChecked"
  android: layout_width = "wrap_content"
  android: layout_height = "wrap_content"
  android: text = "CheckBox">
  </ Checkbox>
  <Textview
  android: id = "@ + id / tvText"
  android: layout_width = "wrap_content"
  android: layout_height = "wrap_content"
  android: layout_gravity = "right"
  android: layout_marginRight = "20dp"
  android: text = "TextView">
  </ TextView>
  </ LinearLayout>
  </ LinearLayout>
Three ImageView, CheckBox and TextView will present each item in the list.
We write the code MainActivity.java :
package ru.startandroid.develop.p0481simpleadapter;

 import java.util.ArrayList;
 import java.util.HashMap;
 import java.util.Map;

 import android.app.Activity;
 import android.os.Bundle;
 import android.widget.ListView;
 import android.widget.SimpleAdapter;

 public class MainActivity extends Activity {

 // имена атрибутов для Map
 final String ATTRIBUTE_NAME_TEXT = "text";
 final String ATTRIBUTE_NAME_CHECKED = "checked";
 final String ATTRIBUTE_NAME_IMAGE = "image";

 ListView lvSimple;

 /** Called when the activity is first created. */
 public void onCreate(Bundle savedInstanceState) {
 super.onCreate(savedInstanceState);
 setContentView(R.layout.main);

 // массивы данных
 String[] texts = { "sometext 1", "sometext 2", "sometext 3",
 "sometext 4", "sometext 5" };
 boolean[] checked = { true, false, false, true, false };
 int img = R.drawable.ic_launcher;

 // упаковываем данные в понятную для адаптера структуру
 ArrayList<Map<String, Object>> data = new ArrayList<Map<String, Object>>(
 texts.length);
 Map<String, Object> m;
 for (int i = 0; i < texts.length; i++) {
 m = new HashMap<String, Object>();
 m.put(ATTRIBUTE_NAME_TEXT, texts[i]);
 m.put(ATTRIBUTE_NAME_CHECKED, checked[i]);
 m.put(ATTRIBUTE_NAME_IMAGE, img);
 data.add(m);
 }

 // массив имен атрибутов, из которых будут читаться данные
 String[] from = { ATTRIBUTE_NAME_TEXT, ATTRIBUTE_NAME_CHECKED,
 ATTRIBUTE_NAME_IMAGE };
 // массив ID View-компонентов, в которые будут вставлять данные
 int[] to = { R.id.tvText, R.id.cbChecked, R.id.ivImg };

 // создаем адаптер
 SimpleAdapter sAdapter = new SimpleAdapter(this, data, R.layout.item,
 from, to);

 // определяем список и присваиваем ему адаптер
 lvSimple = (ListView) findViewById(R.id.lvSimple);
 lvSimple.setAdapter(sAdapter);
 }
 }
Parse the code. We create constants for attribute names, describe data arrays and package this data in ArrayList <Map <String, Object >> (we will have the same img for everyone). Next, we define two arrays that will be used to match data and View components. The from array contains the names of the Map keys , and the to array contains the ID of the View components. Those. the value from the Map element with the key ATTRIBUTE_NAME_TEXT, etc. will be inserted into R.id.tvText. in order. After that we create an adapter and link it to the list.
All save and run. We see that everything is as we planned.
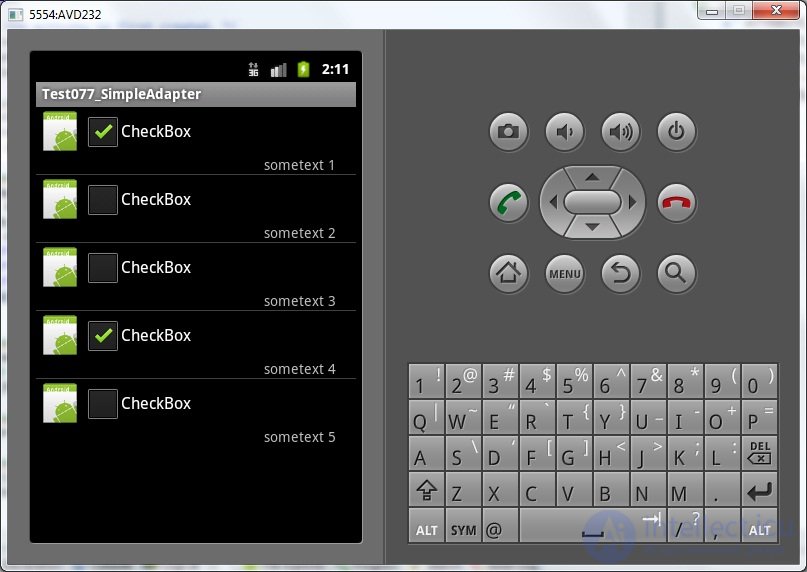
The adapter went through the View components (the to array) for each item in the list and compared the values from the Map ( from the array) to them. Those. A matching map is like this:
R.id.tvText - Map.get (ATTRIBUTE_NAME_TEXT)
R.id.cbChecked - Map.get (ATTRIBUTE_NAME_CHECKED)
R.id.ivImg - Map.get (ATTRIBUTE_NAME_IMAGE)
And how does the adapter understand what methods and for which view components should be called to transfer values from the Map to them? He looks at the type of the View-component and, depending on it, already determines how to work with it. For it, there are three types:
1) View inheriting the Checkable interface. Examples are CheckBox, CheckedTextView, CompoundButton, RadioButton, Switch, ToggleButton. In this case, the adapter checks if the corresponding value from the Map is of type boolean . If yes, then everything is OK and the Checkable.setChecked method is called. Otherwise, we get an error.
Since version 2.2, the algorithm has changed a bit - they have added another branch of logic. Now, if the value from the Map is not boolean , then it is checked that the View is a descendant of TextView . If so, insert the text value from the Map.
2) View, which is TextView or its heirs. Here, the SimpleAdapter.setViewText method is simply called, and it already calls TextView.setText and passes the value from the Map.
3) View, which is ImageView or its heirs. The adapter checks the data type from the Map:
- if they can be brought (instanceof) to type Integer, then the method SimpleAdapter.setViewImage (ImageView v, int value) is called, and he already calls ImageView.setImageResource.
- Otherwise, the SimpleAdapter.setViewImage method (ImageView v, String value) is called, which again tries to cast the value to int and call the ImageView.setImageResource method, and if it does not work out, it converts the string to Uri (Uri.parse) and calls the ImageView method. setImageURI (Uri).
If the View does not match any of the three types listed above, then we get an error.
Let's experiment a bit and try to insert the same text in the CheckBox as in the TextView. The adapter will be able to do this (if the Android version is 2.2 and higher), because CheckBox is a TextView heir.
To do this, we rewrite the filling of arrays:
// массив имен атрибутов, из которых будут читаться данные
 String[] from = { ATTRIBUTE_NAME_TEXT, ATTRIBUTE_NAME_CHECKED,
 ATTRIBUTE_NAME_IMAGE, ATTRIBUTE_NAME_TEXT };

 // массив ID View-компонентов, в которые будут вставлять данные
 int[] to = { R.id.tvText, R.id.cbChecked, R.id.ivImg, R.id.cbChecked };
We added to the adapter an indication that it should be inserted into R.id.cbChecked (CheckBox) and inserted text from the Map using the key ATTRIBUTE_NAME_TEXT.
Save, run.
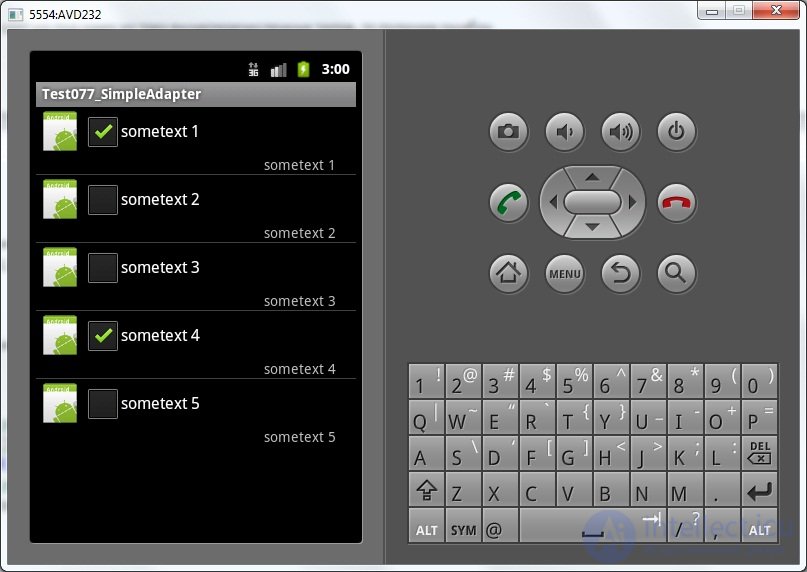
Text successfully inserted into CheckBox.
Now let's try to transfer the data incorrectly. For example, instead of the image id, pass the boolean to R.id.ivImg. To do this, change from:
// массив имен атрибутов, из которых будут читаться данные
 String[] from = { ATTRIBUTE_NAME_TEXT, ATTRIBUTE_NAME_CHECKED,
 ATTRIBUTE_NAME_CHECKED, ATTRIBUTE_NAME_TEXT };
Save, run.
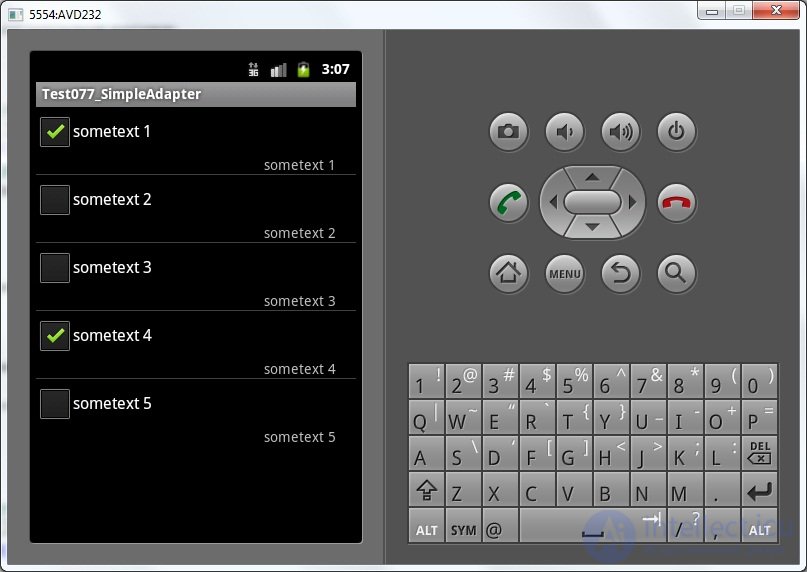
We see that there is no picture. The adapter determined that it was not Integer that was transmitted and tried to show the picture by Uri from the textual interpretation of boolean, but it did not work.
In general, the thing is not bad, but the functionality is quite limited - put a daw, specify a picture and place the text. Next time we will try to expand the functionality for your needs.
I think it makes sense to say that if you put and remove daws in points, the adapter data does not change.
In the next lesson:
- use the methods SetViewText and SetViewImage

Comments
To leave a comment
Mobile Programming (Android IOs)
Terms: Mobile Programming (Android IOs)