Lecture
In this lesson:
- use ListView to build a list
 - video lesson version
Before we start talking about the ListView component, I suggest recalling again the last lesson and the list building mechanism that we used there. We went through the data array, in each iteration we created a list item , filled it with data and placed it in the list .
When creating a ListView to create items for us will be an adapter . The adapter needs data from us and a layout item resource . Next, we assign the adapter to the ListView list. The list, while building, queries the adapter for items, the adapter creates them (using the data and layout) and returns it to the list. As a result, we see a ready list.
There are various types of lists and adapters. For the time being we will consider the simplest option.
Create a project:
Project name : P0421_SimpleList
Build Target : Android 2.3.3
Application name : SimpleList
Package name : ru.startandroid.develop.p0421simplelist
Create Activity : MainActivity
Open main.xml and add the ListView component (Composite tab) to the screen:
  <? xml version = "1.0" encoding = "utf-8"?>
  <LinearLayout
  xmlns: android = "http://schemas.android.com/apk/res/android"
  android: layout_width = "fill_parent"
  android: layout_height = "fill_parent"
  android: orientation = "vertical">
  <Textview
  android: layout_width = "fill_parent"
  android: layout_height = "wrap_content"
  android: text = "@ string / hello">
  </ TextView>
  <ListView
  android: id = "@ + id / lvMain"
  android: layout_width = "match_parent"
  android: layout_height = "wrap_content">
  </ Listview>
  </ LinearLayout>
ListView is the list component.
Now you need to create an adapter . Open MainActivity.java and write:
package ru.startandroid.develop.p0421simplelist;

 import android.app.Activity;
 import android.os.Bundle;
 import android.widget.ArrayAdapter;
 import android.widget.ListView;

 public class MainActivity extends Activity {

 String[] names = { "Иван", "Марья", "Петр", "Антон", "Даша", "Борис",
 "Костя", "Игорь", "Анна", "Денис", "Андрей" };

 /** Called when the activity is first created. */
 public void onCreate(Bundle savedInstanceState) {
 super.onCreate(savedInstanceState);
 setContentView(R.layout.main);

 // находим список
 ListView lvMain = (ListView) findViewById(R.id.lvMain);

 // создаем адаптер
 ArrayAdapter<String> adapter = new ArrayAdapter<String>(this,
 android.R.layout.simple_list_item_1, names);

 // присваиваем адаптер списку
 lvMain.setAdapter(adapter);

 }
 }
You will not believe, but this is all the code needed to create a list)
We use an array of names as data. In onCreate, we find a list, create an adapter, and assign an adapter to the list. Let's see how to create an adapter.
We used this constructor: public ArrayAdapter (Context context, int textViewResourceId, T [] objects)
and passed the following parameters to him:
this - context
android.R.layout.simple_list_item_1 is a system layout file that is a TextView
names - the array of data that we want to list
We can see the contents of the simple_list_item_1 used. To do this, in your project, find the item Android 2.3.3 ., Open it, and open android.jar
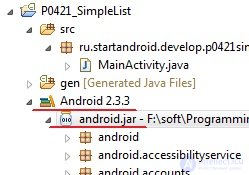
Scroll to the bottom and open res.layout .
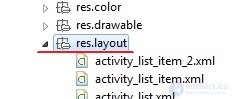
And inside we find the simple_list_item_1 used by us
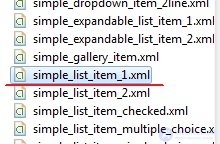
Double click on it and see the contents:
  <? xml version = "1.0" encoding = "utf-8"?>
  <Textview
  xmlns: android = "http://schemas.android.com/apk/res/android"
  android: id = "@ android: id / text1"
  android: layout_width = "match_parent"
  android: layout_height = "wrap_content"
  android: textAppearance = "? android: attr / textAppearanceLarge"
  android: gravity = "center_vertical"
  android: paddingLeft = "6dip"
  android: minHeight = "? android: attr / listPreferredItemHeight">
  </ TextView>
Plain TextView with parameter set.
When the list asks for the next item when forming, the adapter takes this Layout-resource simple_list_item_1 , runs it through LayoutInflater and gets the View , converts the View to the TextView, assigns text from the data array to it and returns it to the list .
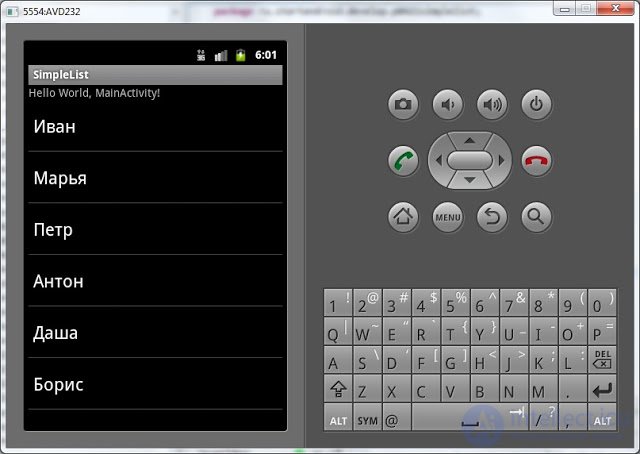
All save and run. We see a list of our data.
Using the system layout-resource simple_list_item_1 is good because we don’t need to draw the layout ourselves. However, if we are not satisfied with what the list looks like using simple_list_item_1 as a list item, we can create our own layout-resource .
Create a layout file my_list_item.xml in the res / layout folder of our project:
  <? xml version = "1.0" encoding = "utf-8"?>
  <Textview
  xmlns: android = "http://schemas.android.com/apk/res/android"
  android: id = "@ + id / textView1"
  android: layout_width = "match_parent"
  android: layout_height = "wrap_content"
  android: gravity = "center_horizontal"
  android: padding = "5dp"
  android: text = "TextView"
  android: textColor = "# 00FF00"
  android: textSize = "24sp">
  </ TextView>
TextView with indication of color and font size, text alignment and indents.
Modify the existing code, specify the adapter our created layout my_list_item :
// создаем адаптер
 ArrayAdapter<String> adapter = new ArrayAdapter<String>(this,
 R.layout. my_list_item , names);
Now the adapter will use it when creating list items.
All save and run. We see our green list:
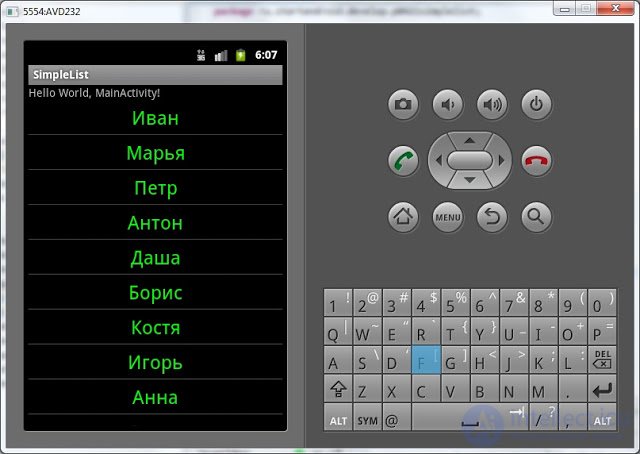
In a layout resource for a list item, instead of TextView, you can use some of its derived classes — for example, Button . The main thing is that the object is converted to TextView . The adapter assigns text to it using the setText method and returns it to the list.
In one of the past lessons, I said that Context is used to access the basic functions of the application. In this lesson we have a good confirmation of these words.
ArrayAdapter uses LayoutInflater to convert a layout resource to View. But getting the LayoutInflater object is one of the basic functions and is not available for the ArrayAdapter class. Therefore, we in ArrayAdapter pass the link to the Activity as a context (the Activity has access to the basic functions through the ascending class hierarchy). And the ArrayAdapter class internally uses the context passed to it to call the LayoutInflater. Without context, he could not do it.
In the next lesson:
- use the ListView for single and multiple selection of items

Пробую открыть двойным кликом simple_list_item_1.xml
Выдает такую ошибку:
Could not open the editor: Android XML Editor cannot process this input.
Похоже, что это баг, который пришел с какой-то новой версией Eclipse или ADT. У меня сейчас тоже не открывается и выдает такую ошибку.
Если очень надо, то можно этот файл через поиск найти в папке android-sdk-windows/platforms
Comments
To leave a comment
Mobile Programming (Android IOs)
Terms: Mobile Programming (Android IOs)