Lecture
In this lesson we:
- learn how to handle button presses and find out what a handler is
Create a project:
Project name : P0091_OnClickButtons
Build Target : Android 2.3.3
Application name : OnClickButtons
Package name : ru.startandroid.develop.onclickbuttons
Create Activity : MainActivity
In the layout file main.xml we write the following and save:
  <? xml version = "1.0" encoding = "utf-8"?>
  <LinearLayout
  xmlns: android = "http://schemas.android.com/apk/res/android"
  android: layout_width = "match_parent"
  android: layout_height = "match_parent"
  android: orientation = "horizontal">
  <LinearLayout
  android: id = "@ + id / linearLayout1"
  android: layout_width = "match_parent"
  android: layout_height = "match_parent"
  android: layout_margin = "30dp"
  android: orientation = "vertical">
  <Textview
  android: id = "@ + id / tvOut"
  android: layout_width = "wrap_content"
  android: layout_height = "wrap_content"
  android: layout_gravity = "center_horizontal"
  android: layout_marginBottom = "50dp"
  android: text = "TextView">
  </ TextView>
  <Button
  android: id = "@ + id / btnOk"
  android: layout_width = "100dp"
  android: layout_height = "wrap_content"
  android: layout_gravity = "center_horizontal"
  android: text = "OK">
  </ Button>
  <Button
  android: id = "@ + id / btnCancel"
  android: layout_width = "100dp"
  android: layout_height = "wrap_content"
  android: layout_gravity = "center_horizontal"
  android: text = "Cancel">
  </ Button>
  </ LinearLayout>
  </ LinearLayout>
We have a TextView with text and two buttons: OK and Cancel. We will make the TextView contents change when the button is pressed. By pressing the OK button - we will display the text: “OK button pressed”, by pressing Cancel - “Cancel button pressed”.
Open MainActivity.java . The description of objects is moved outside the onCreate method. This is done so that we can refer to them from any method. In onCreate, we will fill these objects with the help of the findViewById method that we have already passed. The result should be the following code:
public class MainActivity extends Activity {

 TextView tvOut;
 Button btnOk;
 Button btnCancel;

 /** Called when the activity is first created. */
 @Override
 public void onCreate(Bundle savedInstanceState) {
 super.onCreate(savedInstanceState);
 setContentView(R.layout.main);

 // найдем View-элементы
 tvOut = (TextView) findViewById(R.id.tvOut);
 btnOk = (Button) findViewById(R.id.btnOk);
 btnCancel = (Button) findViewById(R.id.btnCancel);

 }
 }
Update the import section (CTRL + SHIFT + O). The tvOut, btnOk and btnCancel objects correspond to the View elements of the screen and we can work with them. We need to teach the button to respond to pressing. For this, the button has a method setOnClickListener (View.OnClickListener l). The object with the interface View.OnClickListener is input. It is to this object that the button will charge to handle the presses. Let's create such an object. We continue to write code in onCreate:
OnClickListener oclBtnOk = new OnClickListener() {
 @Override
 public void onClick(View v) {
 // TODO Auto-generated method stub

 }
 };
Eclipse stresses OnClickListener with a red line. 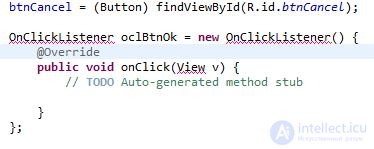
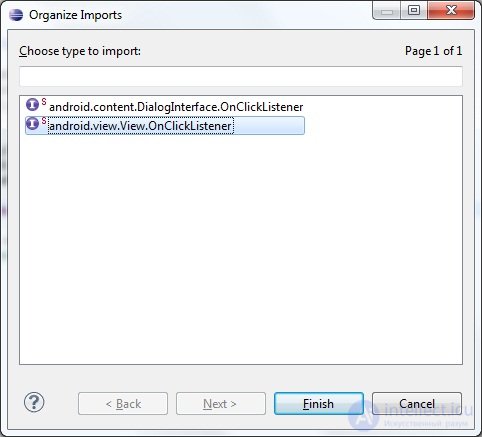
because don't know him yet You need to update the import section. We press CTRL + SHIFT + O, Eclipse shows us that it knows two interfaces named onClickListener and offers to choose. We need View.OnClickListener, because The setOnClickListener button method accepts it as input.
So, we have created an oclBtnOk object that implements the View.OnClickListener interface. The object contains an onClick method - this is exactly what we need. This method will be called when the button is pressed. We decided that by pressing we will display the text: “Ok button pressed” in TextView (tvOut). We realize it.
In the onClick method we write:
tvOut.setText("Нажата кнопка ОК"); The click handler is ready. It remains to "feed" his button using the setOnClickListener method.
btnOk.setOnClickListener(oclBtnOk); The result should be this code:
public class MainActivity extends Activity {

 TextView tvOut;
 Button btnOk;
 Button btnCancel;

 /** Called when the activity is first created. */
 @Override
 public void onCreate(Bundle savedInstanceState) {
 super.onCreate(savedInstanceState);
 setContentView(R.layout.main);

 // найдем View-элементы
 tvOut = (TextView) findViewById(R.id.tvOut);
 btnOk = (Button) findViewById(R.id.btnOk);
 btnCancel = (Button) findViewById(R.id.btnCancel);

 // создаем обработчик нажатия
 OnClickListener oclBtnOk = new OnClickListener() {
 @Override
 public void onClick(View v) {
 // Меняем текст в TextView (tvOut)
 tvOut.setText("Нажата кнопка ОК");
 }
 };

 // присвоим обработчик кнопке OK (btnOk)
 btnOk.setOnClickListener(oclBtnOk);
 }
 }
All save and run. Click on the OK button and see. What text has changed

Clicking Cancel does not lead to anything yet, because for it we did not create a handler and did not assign it. Let's do it in the same way as for the OK button. First we create a handler:
OnClickListener oclBtnCancel = new OnClickListener() {
 @Override
 public void onClick(View v) {
 // Меняем текст в TextView (tvOut)
 tvOut.setText("Нажата кнопка Cancel");
 }
 };
Then assign it to the button:
btnCancel.setOnClickListener(oclBtnCancel);
Save, run, check. Both buttons now handle handles.
Let's talk again about the event handling mechanism using the example of a button click. The button itself cannot handle clicks, it needs a handler (it is also called the listener), which is assigned using the setOnClickListener method. When a button is clicked, the handler responds and executes code from the onClick method. This can be represented as:
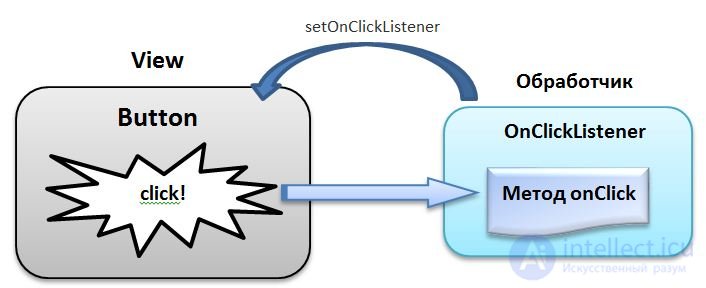
Accordingly, for the implementation, you must perform the following steps:
- create handler
- fill the onClick method
- assign the handler to the button
and the event handling system is ready.
In the next lesson:
- learn to use one handler for multiple view-elements
- teach the Activity to act as a handler

Comments
To leave a comment
Mobile Programming (Android IOs)
Terms: Mobile Programming (Android IOs)