Lecture

You have already created an isometric pixel art character, but where does he live? It's time to make a home for him!
As in Lego, buildings are the whole meaning of pixel art. Their creation will take some time, but you will spend this time nicely!
If you have not passed the Isometric Pixel Art lesson in Photoshop, you better start with it; we will use the character from this tutorial and skip the photoshop tips that have already been reviewed.
Step 1
We need to figure out how to divide the size of the elements of the house. There is no need to approach this too technically (our character has not very realistic proportions). We simply use the character as the measure and decide how high we want the doors, windows and roof to keep the size of the pixel environment.
We stopped at this:
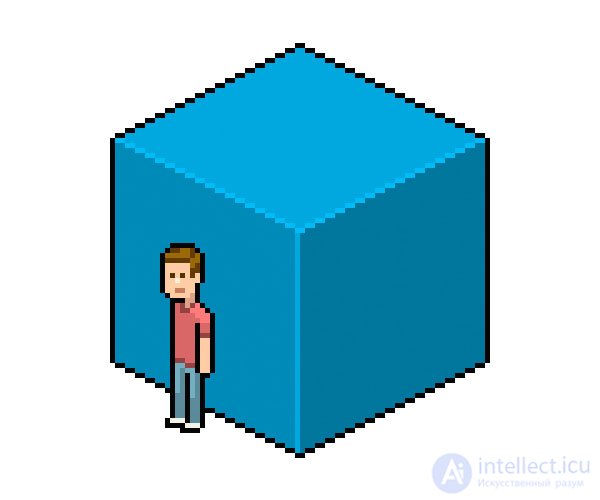
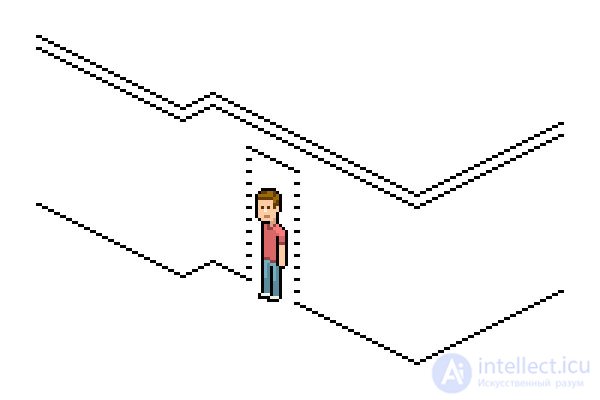
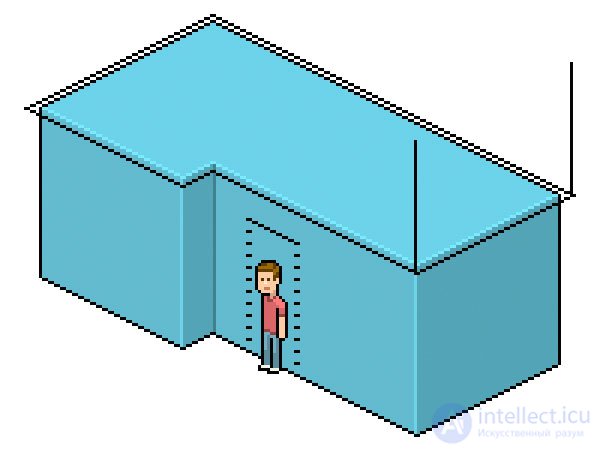
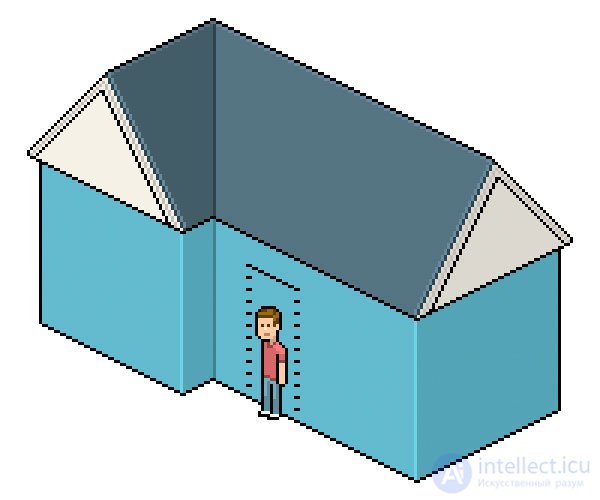
Now let's take our character and decide on some heights.
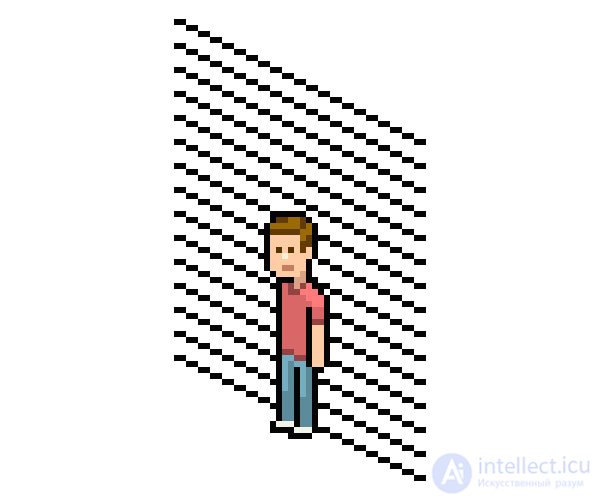
On the new layer, let's create a “wall” of 2: 1 lines, each 4px higher than the previous one (also seen as three empty pixels between each line). If we choose heights that fit these lines, later it will make adding textures, such as bricks or wood, more aesthetically pleasing.
Step 2
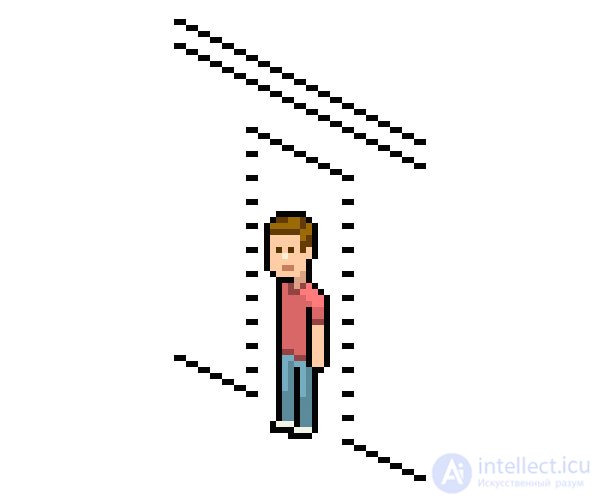
Here are the heights I chose for the doorway, the ceiling and the second floor. Although we will not see the ceiling and second floor, the definition of these lines usually benefits.
Let's continue to grow our structure, but not very much! If you do not want to make a cut view of the interior, it is better to make the building just large enough to convey the idea of an ordinary house. This way we can fit more elements into a smaller space, which is useful in a more complex urban scene, and in any case it is preferable not to include unnecessary elements. Both in life and in pixel art.
Step 3
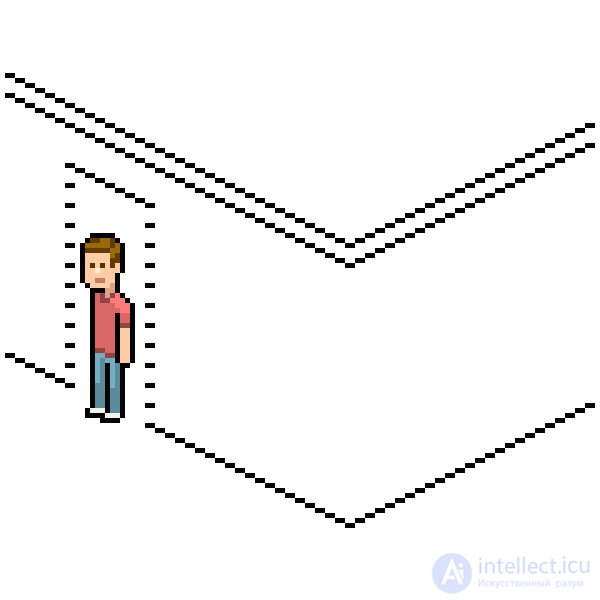
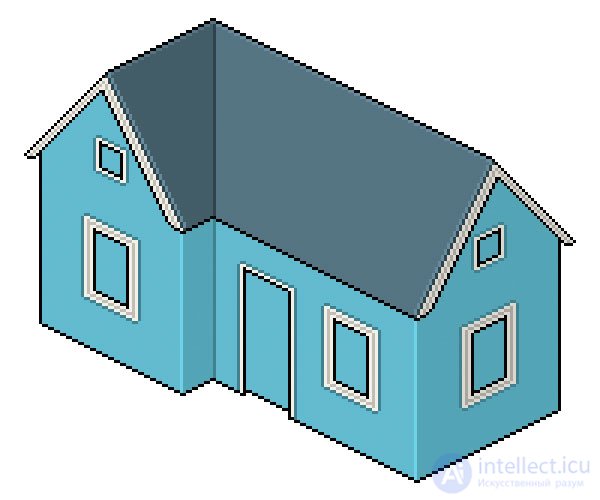
We will make the foundation in an L-shape to add intricacy to it; the house will look nicer, and we will learn more geometry.
Now we need to continue the structure in one direction only. Here it is, with the added length to the right of the door: 40px from the edge of the doorway to the edge of the new corner.

Here is a room with one or two windows. We will deal with it later.
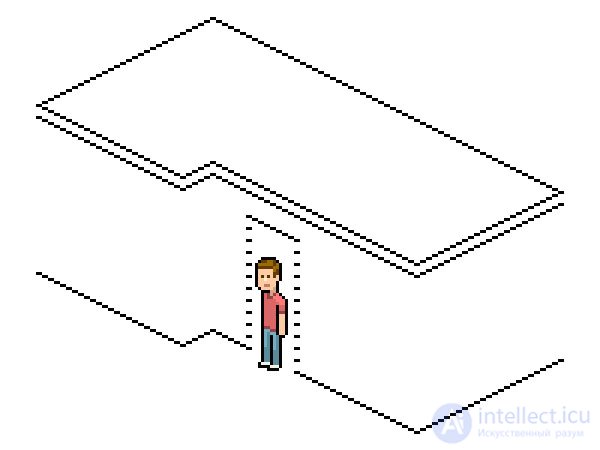
Step 4
Now let's select a section of these lines, apply an alt-offset (or copy / paste), horizontally reflect them and place them on the right front wall, then extend the lines until they become 50px wide :
Step 5
Now select the entire left front wall plus 10px of the right wall ( 60px should go out altogether ), apply the alt-offset , Flip Horizontal, and then place on the other side to make our L:
We just skip the bottom lines needed for L, instead just draw the lines above them:
Now let's close the forms and fill them with color in the same way as in the previous article. Leave the door labels and remove the ceiling marker.
Step 6
You can go to the Image> Correction> Hue / Saturation menu (Image> Adjustments> Hue / Saturation) to easily evaluate the various color options and pick the one you like. Choose earth tones if you want to make a brick house, or any other color that you prefer for the texture of wooden boards or walls without textures.
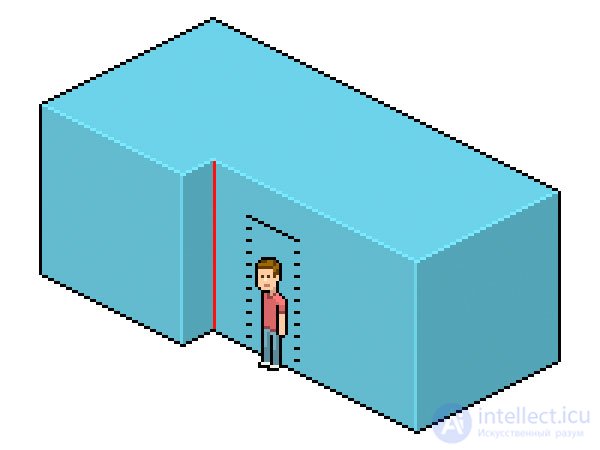
I marked in red what we have not yet met: the corner of the "trench". All corners of the cube were "outside", so the lighter colors looked great. But for hollows, using light colors does not make sense, and black can be too coarse, so the best way is to use color 10% or 15% darker than the color of the walls:

It seems that we have received the basic forms, but there is still something very important and more complex.
Step 1
Create a new layer and draw a flat L-shape on it, right above the base of the house. But it should be wider, since the roofs of houses are usually wider than the walls. Therefore, these new lines should leave a strip of empty pixels between black lines and two lines of empty pixels at bright corners:
These new lines will be the bottom of the roof.
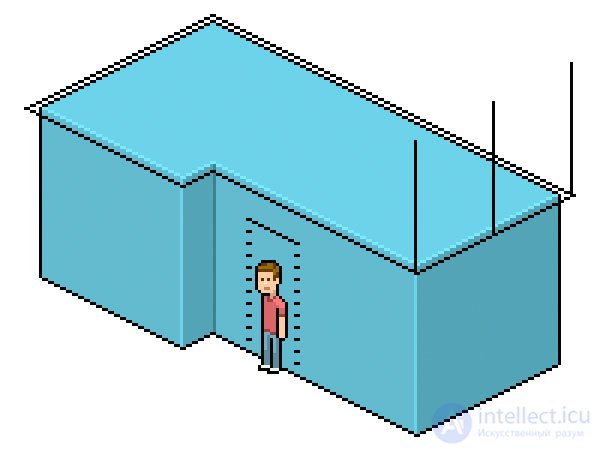
Step 2
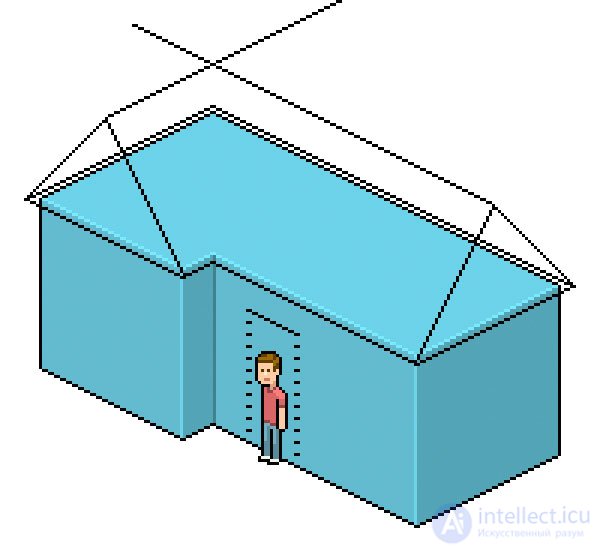
Create a new layer and draw several vertical lines from the two corners of our L:
(The right line is not drawn exactly from the right corner, because I prefer to get rid of this pixel when I finish the form ... just like we did with the cube and L.)
Step 3
Now find a space between these two lines to add a third. You can measure with the selection tool or you can shift the selection and calculate the distance as you move it using the arrows on the keyboard (remember: moving with shift Shift moves the selection 10px at a time)
Now we know where the lines should meet to make the top corner of the roof. We just need to draw them. You can try any number of angles you like, but I recommend only two to avoid jagged lines:
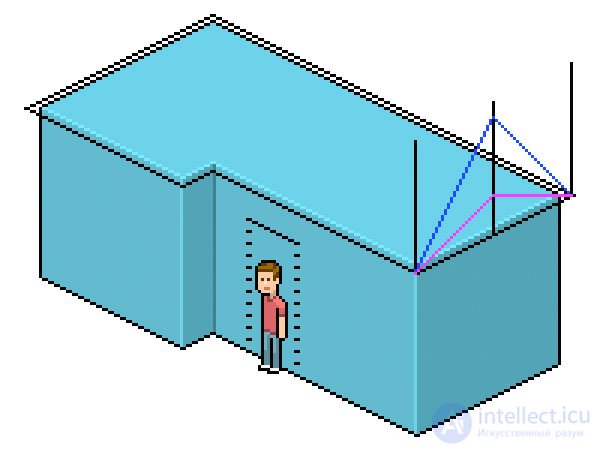
One of them is a diagonal line of type 1: 1 with a straight horizontal line, and the second is 1: 2 with 1: 1.
We will work with longer lines. Let's get rid of the guides, leave only the blue lines, then turn them black. There is no need to merge the layer yet.
Step 4
Copy the long line that forms the back of the roof of our L, then paste it over the roof point so that the three lines meet in one place.
It should look like this:
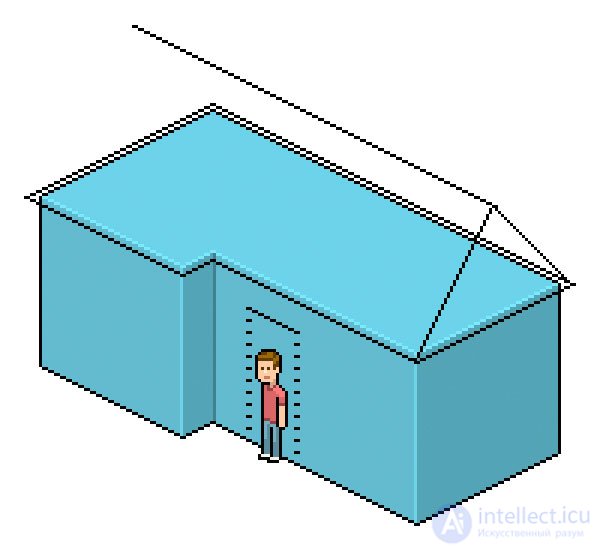
Here, this line should look quite good. You can ignore the following advice - it is very petty and I know it - I like to place my darker 2: 1 lines on a certain, almost imaginary grid, where the pixel distance between them all is always an even number. I do this in order to maintain consistency and because it allows me to maintain perfect aestheticism even after adjusting the elements or moving them.
Therefore, in our case, it is better that the new line is just lower or higher by one pixel as shown in the figure:
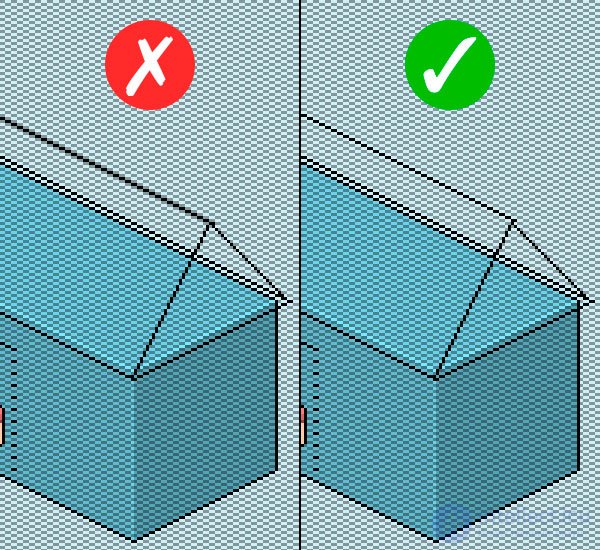
If you follow this rule, it is worth a little to shift the diagonal line of type 1: 1.
Step 5
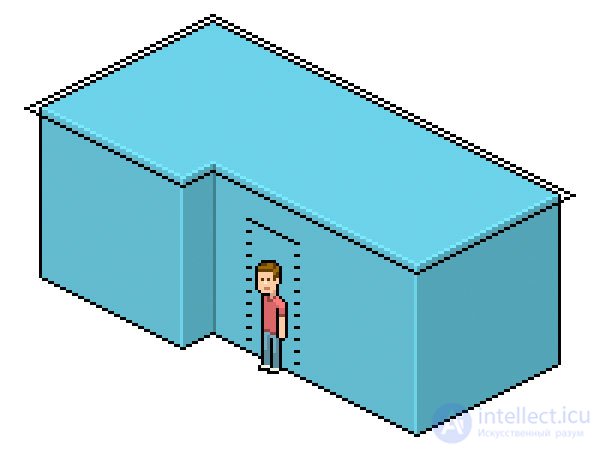
Now let's combine the roof lines (but not yet with the L-shaped base layer), then apply the alt-offset , Flip Horizontal and place it on the left side of the L-base to get this result:
We will no longer need the lines at the top, so erase them and add a vertical line to make a hollow angle. On a layer with an L-shaped roof base, erase the two black lines in the background (two lines higher on the screen), and then merge the layer with the roof lines and the layer with the base of the roof.
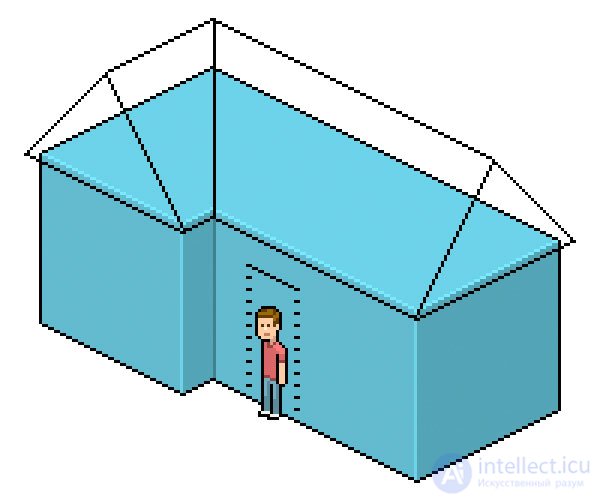
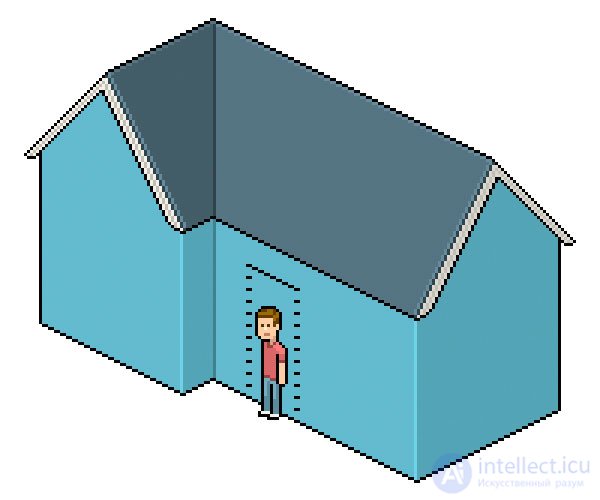
Now, despite the fact that we remove part of it, let's add color to the whole roof. Try to apply the knowledge gained in drawing the cube, although the shapes are very different.

I think the highlight shape on the top gives it a much better look.
Step 7
Now make the two triangles almost white (the one on the right should be slightly darker) and separate the white color from the roof with a darker tone, like the one we used for the inside corner of the roof.
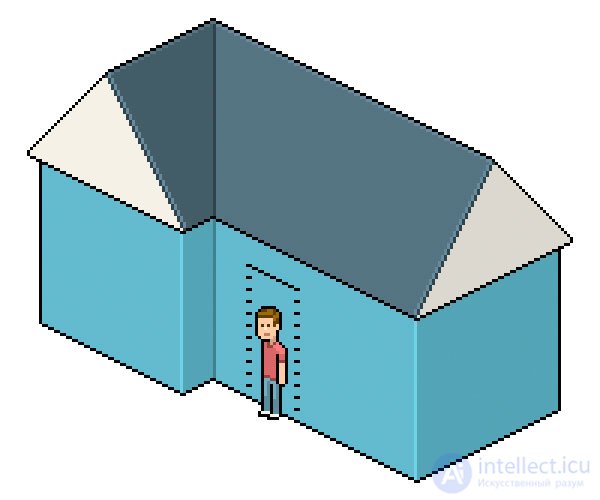
Step 8
Now let's add a lightweight decorative element by drawing several lines parallel to the roof diagonals. Leaving an empty pixel, add a line of a darker white and then (one more pixel below) a black line to make something like this:
Step 9
Now we need to remove the white zones in the middle and the black stripes below, we can also correct the drawing if necessary.

This is not necessary, but now we can combine the roof layer with the L-layer of the house. It should be easier to fill the empty areas of the triangles with the color of the walls before merging. Lasso Tool  (Lasso Tool) - your friend; just remember to uncheck anti-alias.
Fine! We have done quite a bit of geometric work!
Step 1
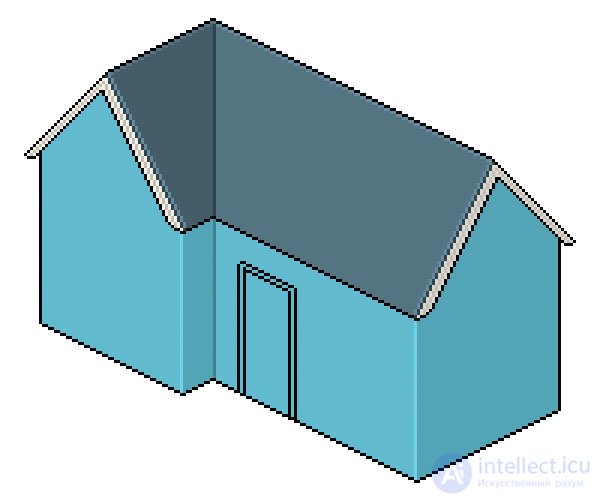
This is not a house without doors and multiple windows. Fortunately, we already know where our door will be, so let's add a few vertical lines and one additional 2: 1 line under our height marker to make a doorway. We will also temporarily remove the character.
Step 2
Now in this empty boring place looking at us there should be a window. It can be almost the same as the doorway, so keep the top edge at the same level and center it between the edge of the door and the corner of the house. If you want, make it narrower or wider. We will add another rectangle to make the window frame look more detailed and wide.
If you move the bottom line of the door a pixel or two, it will not look so flat:

The bottom line of the window should be ideally above the floor for a multiple of four, as the initial wall of 2: 1 lines.
Step 3
We still have two bare walls, so we simply copy the same window onto these walls, place it as central as possible and of course on the same level, starting from the bottom line (it helps to choose the window along with the bottom line to make everything easier).
There are more places around these two new windows, so they should be wider and more detailed. We will keep them the same, but you are free to try the alternative. What we will add is a couple of smaller windows at the top. They will look like small windows for an attic and help fill empty walls, making the house more pleasant and detailed.
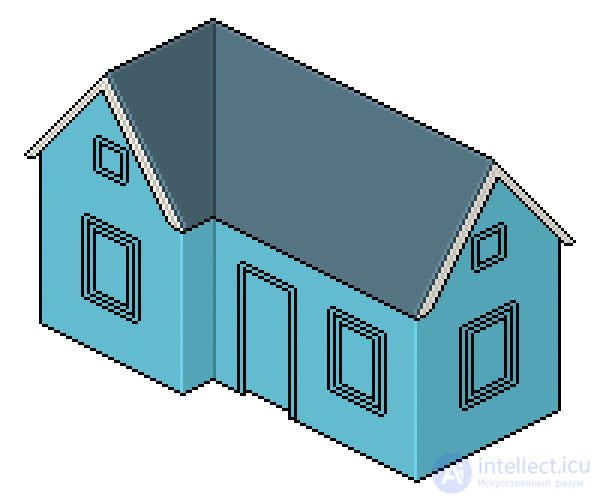
(Do not worry if the smaller windows are not centered relative to the roof, because the roof itself is not at the same vertical level as the walls and windows.)
Step 4
This concludes the addition of details, but there are still many possibilities that can be added. Look for similar pictures and try to add something to your pixel house.
Now we need to paint and complete all these elements. Let's make the window frames white, and also paint all the black lines between the windows and the walls with the same color that we used for the inside corner of the house. And the black lines in the window frames should be slightly darker than the white, as we did with the white parts of the roof.
Of course, you can color one of the windows and then copy it to the others. Just remember that the elements on the darker side of the house should be correspondingly darker.
Step 5
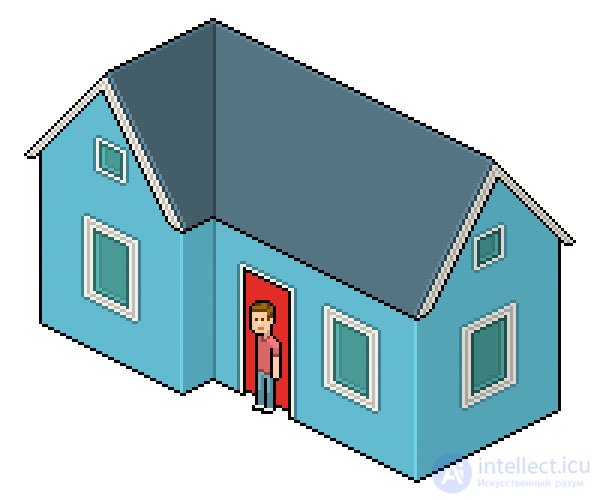
Now pick the colors you like for the door and the windows. It makes sense to use white for the door, but I like the way red looks like because it stands out from my blue palette. For windows, I usually like to use pale aquamarine, but you can try alternatives. There should be dozens of ways to illustrate glass panels, so you can try to find a better way than in this lesson.

Notice that I got rid of most of the black lines on the details. I think it makes sense to do this when the elements of different colors are in close contact, black looks too rough.
Here I added two lighter lines immediately behind the dark stripe. It seems to me that they will look like a reflection of a window frame, which will help make our windows look like real glass.
Step 6
I also returned the character to help place the door knob, which should be about elbow level.

Added golden door handle.
Step 7
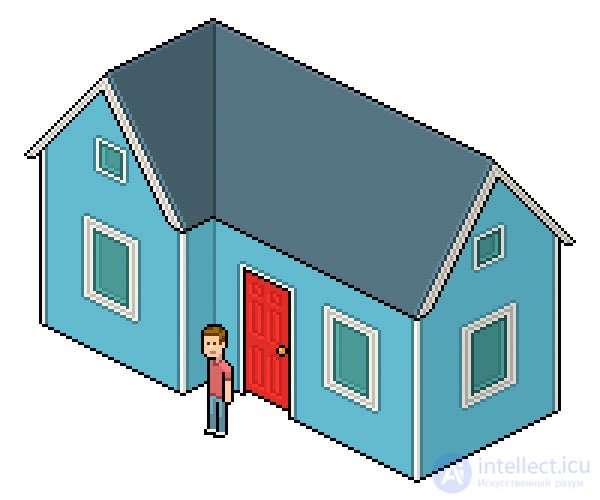
For the final details, we can add some decoration to the door; they are just a few rectangles of a darker shade, plus a few bright lines below and on one side. Also, why not add a few white boards on the outer corners as in many modern homes:
Let's create and apply textures. The areas we need are, of course, the roof and walls.
Let's start with the roof. Create a new layer.
We will draw some slightly round tiles that will go along the top line, and when there are enough of them, apply the alt-offset and start adding them at the bottom.
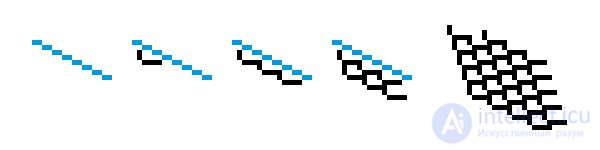
Step 2
The second row of tiles is located at this position, because they first move along by 2px (following the upper line) to be in the overlap position, like bricks, and then they move down (following the diagonal side) by a few more pixels. If this sounds difficult, just follow the visual instructions below and everything will turn out fine. After you have a large piece of texture, duplicate it several times so that it covers the roof:
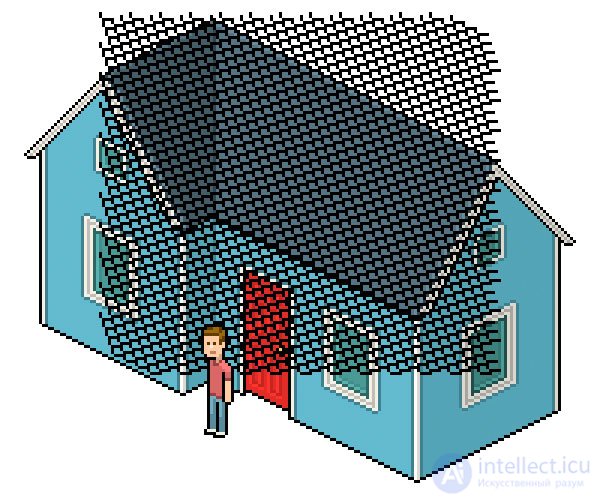
Step 3
On the left side of the roof, the texture should lie in the opposite direction, so reflect this area horizontally (Flip Horizontal). After that, go to the layer with the house and use the Magic Wand tool.  (Magic Wand) to select all the colors of the roof (except black lines). If you hold Shift , you can continue to add zones to the selection. When you have finished the selection, go to the layer with the texture, invert the selection through the menu Select> Invert (Select> Inverse) and delete it to get the following result:

Step 4
Before merging the layers, you need to reduce the opacity (Opacity) of the texture layer to about 20% . But what I would advise to keep our color palette in order - you can replace the texture color with dark shades that were already used in the roof:
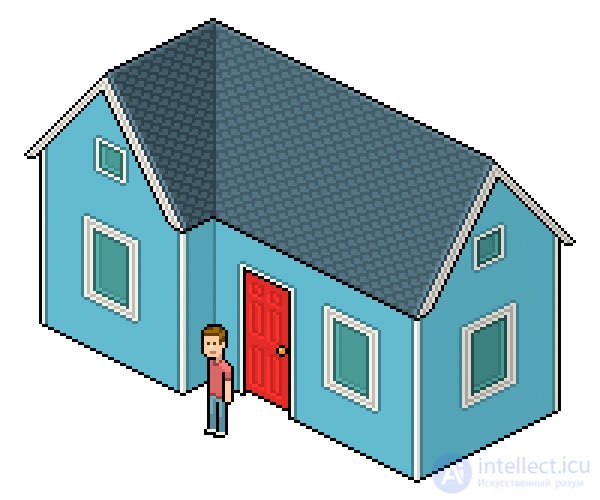
I also removed the texture from the edges of the backlight to make the roof a little cleaner.
Step 5
For the texture of the tree, we just need to draw the lines along the basement of the house, then use the alt-offset to move them 4px upwards, repeating this process until the lines cover all the walls:
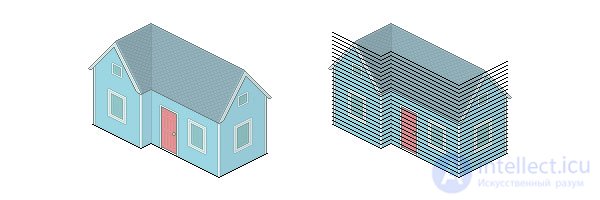
Then repeat the process from step four:
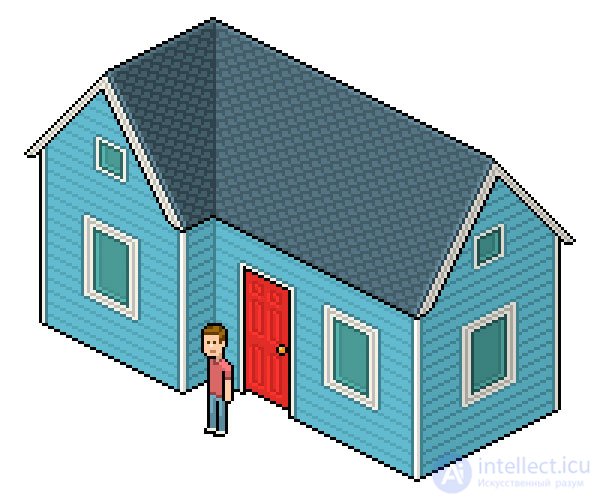
Congratulations! Your home is ready!
You have created a home for the character, but his world must continue to grow. If you liked the lesson, go for the sequel!


Comments
To leave a comment
design software UI and Web design
Terms: design software UI and Web design