Lecture
Grunt is a tool for building javascript projects from the command line using tasks. The release came out quite recently, the author Ben "Cowboy" Alman, the project is on github. In this article I will discuss the basics of Grunt, its installation and use.
Please note that at the moment Grunt is in beta status and is actively developing, while writing the article version 0.3.9 was used .
Installation
Grunt is installed as an NPM (Node Package Manager) module. If you don't have node.js and npm installed, then you need to install them. This can be done from the official site node.js or, if you have a Mac, use homebrew. Then you need to install the npm package manager for node (you can draw a parallel between npm and ruby gems). Please note that if you install node.js from the official site, then npm is included . Separately, you need to install npm only if you compiled node.js from source or used homebrew.
Directly installing Grunt is done with a simple npm install -g grunt command npm install -g grunt . The -g flag means installation globally, that is, Grunt will always be available from the command line, since it is installed in the root node_modules folder. If you want to run Grunt only in a specific folder, then in it, run the same command without the -g flag. After successful installation, the console output looks like this:
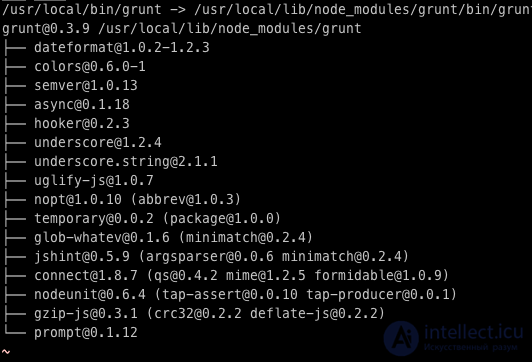
If you see a similar picture on your screen, it means Grunt is installed with all dependencies and we can start creating the project.
Initialization
First you need to initialize a new project. Grunt contains several convenient templates that allow you to initialize projects such as commonjs , jquery and node . For example, let's create a jQuery project. Create a folder for the project and execute grunt init:jquery in it. You will be asked a few questions. The default value of Grunt is shown in brackets, and if you don’t want to change it, just hit enter. I looked like this:

The first file we’ll look at is grunt.js (also called gruntfile ). Its content may not seem very clear, do not worry about it. Most importantly, Grunt added the qunit section to the file and created the test folder in the project. He also added instructions for merging files and tracking files. The latter means automatic start of tasks at any change of files:
watch: { files: '', tasks: 'lint qunit' }
This task uses files from the config:lint.files , that is, refers to the following section of the config:lint.files :
lint: { files: ['grunt.js', 'src/**/*.js', 'test/**/*.js'] }
Grunt will automatically run the lint and qunit (which do exactly what you thought) as soon as any of these files change. Very graceful! I will demonstrate it a little later.
At the end of the file you see the following:
grunt.registerTask('default', 'lint qunit concat min');
This is an instruction for Grunt that, when started without parameters, lint , qunit , concat and min must be executed.
Launch
Type grunt in the terminal and hit enter. Unfortunately, it didn't work as expected for me:
Running "lint:files" (lint) task Lint free. Running "qunit:files" (qunit) task Testing jquery.jsplayground-demo.html Running PhantomJS...ERROR
Installing PhantomJS is quite simple, there is an instruction here. PhantomJS is a console engine for Javascript that will allow us to run qunit tests. After installing PhantomJS, the console output for the grunt command will be:
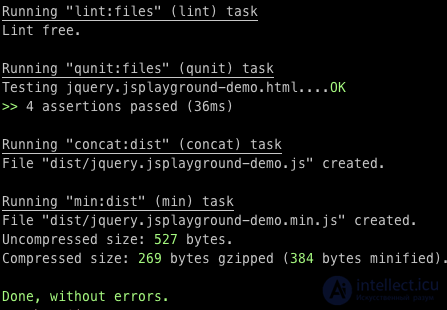
So, what did this script do:
I do not know how for you, but for me this is a great result for just one team!
If, say, I want to run all these commands every time I change files, I just need to edit grunt.js . Find the watch section, which looks like this:
watch: { files: '', tasks: 'lint qunit' },
I can add concat and min tasks here, but as you remember, we defined a default task that performs all of these actions. Therefore, when changing files, I can simply run default :
watch: { files: '', tasks: 'default' }
Of course, in reality, running concat and min every time you save it is too, I just wanted to show that it is possible. You can create several tasks, one to run by default, another to run when released, a third to run during development, etc.
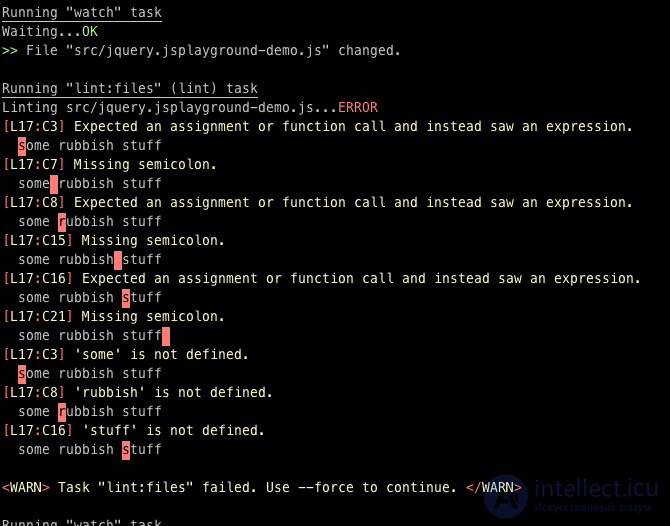
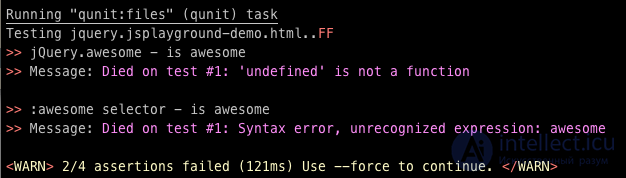
Now let's take a look at the js-file that was automatically created in src/jquery.jsplayground-demo.js . Inside there is an indication of the license, copyright and a link to github - all this is added automatically by the grunt init:jquery command. Now let's make changes to this file to see watch in action. First, you need to run watch in the terminal: grunt watch . Now we’ll make a change: I’m going to enter invalid javascript so we can see the JSLint error. I typed some rubbish stuff in the file and saved it. The output in the terminal is automatically updated:
I’ll fix it now, but I’ll also remove all jQuery code except $.fn.awesome . Grunt automatically generated several tests, so when I save the file, you will see the tests drop. Since the code being tested will be deleted.
And now I will delete the extra tests, and all the tasks will be successfully completed:
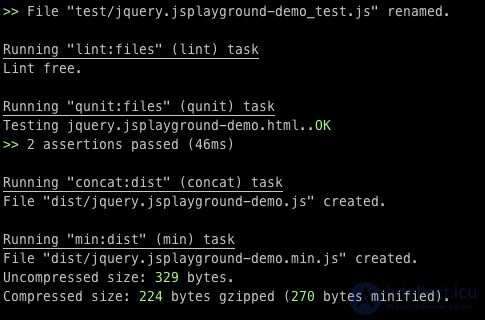
Just imagine how comfortable it is to work on a project by running grunt watch and knowing that all the code has been tested, tested and minified.

Comments
To leave a comment
Scripting client side JavaScript, jqvery, BackBone
Terms: Scripting client side JavaScript, jqvery, BackBone