Lecture
The jQuery UI library extends part of the methods that are part of the jQuery library core, so that it is possible to animate various kinds of transitions between element states. The spectrum of transitions covered by the animation extends from changing colors to applying CSS classes. By intelligently using these features, you can significantly improve the web application, and for this purpose some additional animation effects are defined in the jQuery UI.
In the jQuery UI library, color animation support is enhanced by extending the capabilities of the jQuery animate () method. You can animate one of several CSS properties that define element colors. The list of properties supported by the animate () method is shown in the table below:
| Property | Description |
|---|---|
| backgroundColor | Sets the background color of the item. |
| borderTopColor, borderBottomColor, borderLeftColor, borderRightColor | Sets the color of individual borders of an item. |
| color | Sets the text color for the item. |
| outlineColor | Sets the color of the stroke — used to visually highlight the item. |
To animate colors, you need to pass to the animate () method as an argument a map display object detailing the properties you want to animate and their target values. The corresponding example is shown below:
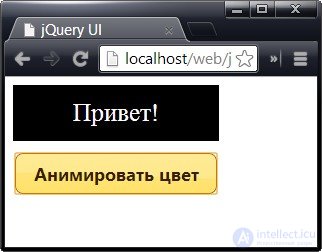
<!DOCTYPE html> <html> <head> <meta charset="utf-8"> <title>jQuery UI</title> <script src="//ajax.googleapis.com/ajax/libs/jquery/1.10.2/jquery.min.js"></script> <script src="//ajax.aspnetcdn.com/ajax/jquery.ui/1.10.3/jquery-ui.min.js"></script> <link rel="stylesheet" href="http://ajax.aspnetcdn.com/ajax/jquery.ui/1.10.3/themes/sunny/jquery-ui.css"> <style type="text/css"> #animTarget { background-color: white; color: black; border: medium solid black; width: 200px; height: 50px; text-align: center; font-size: 25px; line-height: 50px; display: block; margin-bottom: 10px; } </style> <script type="text/javascript"> $(function() { $('button').button().click(function() { $('#animTarget').animate({ backgroundColor: "black", color: "white" }, 1000) }) }); </script> </head> <body> <div id=animTarget> Привет! </div> <button>Анимировать цвет</button> </body> </html> Запустить пример In this document, the primary black color and white background are initially set for the div element. Clicking a button calls the animate () method, which changes these colors to white and black, respectively. The color change takes place smoothly, and both colors are animated at the same time. The result is illustrated in the figure:
Notice that the style element uses standard CSS property names, such as background-color. When specifying the same property in the map object, we turn to the use of the so-called "camel case" (camel case) - backgroundColor. This allows you to specify a CSS property as a property of the JavaScript object, without enclosing the term in quotes.
In this example, CSS literals are used to specify colors: black and white. Literal names exist for a large number of colors, but the animate () method also accepts hexadecimal values, such as #FFFFFF, and RGB values, such as rgb (255, 255, 255).
The jQuery UI library provides a convenient way to animate sets of CSS properties using classes. Instead of specifying each property individually, you simply define the properties and values in the class and tell jQuery UI to add the class to one or more elements. The transition of elements from one state to another will be automatically animated by the jQuery UI library. The demo is shown below:
<!DOCTYPE html> ... <style type="text/css"> .elemClass { background-color: white; color: black; border: medium solid black; width: 200px; height: 50px; text-align: center; font-size: 25px; line-height: 50px; display: block; margin-bottom: 10px; } .myClass { font-size: 40px; background-color: black; color: white; } </style> <script type="text/javascript"> $(function() { $('button').button().click(function() { if (this.id == "add") { $('#animTarget').addClass("myClass", "fast") } else { $('#animTarget').removeClass("myClass", "fast") } }) }); </script> </head> <body> <div id=animTarget class="elemClass"> Привет! </div> <button id="add">Добавить класс</button> <button id="remove">Удалить класс</button> </body> </html> Запустить пример Here we also come across an example of how jQuery UI extends existing jQuery addClass () and removeClass () methods to endow them with additional functionality. Versions of jQuery UI do the same, but now you can set the duration of the animation by specifying it as the second argument when calling the method, and the jQuery UI animates the transition from one class to another.
In this example, the class myClass is defined, and the document provides buttons that add and remove this class using the literal value fast to indicate the duration of the animation.
The standard rules for cascading CSS styles apply here, i.e. the properties specified in the class are applied only if it has the greatest specificity with respect to the target element or elements. In the previous example, we set the style of the initial state of the element using the id attribute, but in this example, in order for the modifications to take effect, a class is used for this purpose.
In addition to improving some of the standard methods, jQuery UI defines a switchClass () method that removes one class and adds another while simultaneously animating the transition from one state to another. The corresponding demo is shown below:
<!DOCTYPE html> ... <style type="text/css"> .elemClass { background-color: white; color: black; border: medium solid black; width: 200px; height: 50px; text-align: center; font-size: 25px; line-height: 50px; display: block; margin-bottom: 10px; } .classOne { font-size: 25px; background-color: white; color: black; } .classTwo { font-size: 40px; background-color: black; color: white; } </style> <script type="text/javascript"> $(function() { $('button').button().click(function() { $('.classOne').switchClass("classOne", "classTwo", 800); $('.classTwo').switchClass("classTwo", "classOne", 800); }) }); </script> </head> <body> <div id=animTarget class="elemClass classOne"> Привет! </div> <button>Сменить класс</button> </body> </html> Запустить пример The arguments to the switchClass () method are the class to be removed, the class to be added, and the duration of the animation. In this example, both classes define the same properties, but this is not at all necessary.
The jQuery UI library includes a number of animation effects that can be applied to elements in the same way as jQuery core effects. I recommend using them sparingly. Indeed, animation that is used within reasonable limits can increase the comfort of working with an application, but often animation effects become a source of irritation and discontent among users. The library has many animation effects, including blind , bounce , clip , drop , explode , fade , fold , highlight , puff , pulsate , scale , shake , size and slide .
This article only shows how these effects are applied, without a detailed discussion of each of them. A good description of the effects, as well as the settings applied to some of them, is available on the page docs.jQuery.com/UI/Effects.
The jQuery UI library also provides improved versions of the show (), hide () and toggle () methods, which allow you to create animation effects. To use upgraded versions, it is sufficient to provide the corresponding method with additional arguments defining the desired effect and the period of time during which it should be applied. An example of using improved versions of these methods is given below:
<!DOCTYPE html> ... <style type="text/css"> .elemClass { font-size: 25px; background-color: white; color: black; border: medium solid black; width: 200px; height: 50px; text-align: center; line-height: 50px; display: block; margin-bottom: 10px; } </style> <script type="text/javascript"> $(function() { $('button').button().click(function() { switch (this.id) { case "show": $('#animTarget').show("fold", "fast"); break; case "hide": $('#animTarget').hide("fold", "fast"); break; case "toggle": $('#animTarget').toggle("fold", "fast"); break; } }) }); </script> </head> <body> <div id=animTarget class="elemClass"> Привет! </div> <button id="hide">Скрыть</button> <button id="show">Показать</button> <button id="toggle">Переключить</button> </body> </html> Запустить пример The example has three buttons, clicking on which allows you to call the show (), hide () and toggle () methods. For all three buttons, the animation is set to fold, the duration of which is determined by the literal value fast. These methods work like their counterparts from the jQuery core, with the exception that in this case the transition is animated.
In the jQuery UI library, the effect () method is defined, which allows you to apply animation to an element without using the “hide / display” logic. With a good choice of the type of animation, this feature is a convenient way to draw the user's attention to a particular element in the document. The corresponding demo is shown below:
<!DOCTYPE html> ... <style type="text/css"> .elemClass { font-size: 25px; background-color: white; color: black; border: medium solid black; width: 200px; height: 50px; text-align: center; line-height: 50px; display: block; margin-bottom: 10px; } </style> <script type="text/javascript"> $(function() { $('button').button().click(function() { $('#animTarget').effect("pulsate", 1000) }) }); </script> </head> <body> <div id=animTarget class="elemClass"> Привет! </div> <button>Эффект</button> </body> </html> Запустить пример In this example, clicking on the button causes the effect to be applied "on the spot", without any constant changes in visibility. In this case, the pulsate effect is used, which causes the element to pulsate.

Comments
To leave a comment
Scripting client side JavaScript, jqvery, BackBone
Terms: Scripting client side JavaScript, jqvery, BackBone